07-23-2017, 12:13 PM
Looking fantastic 
Times I have been electrocuted in 2021
As of 1/01/2021
AC: 4 DC: 1
Last year: 6

|
Nathan's Philco 118MX

07-23-2017, 12:13 PM
Looking fantastic
Times I have been electrocuted in 2021
As of 1/01/2021
AC: 4 DC: 1
Last year: 6

08-04-2017, 10:43 PM
Progress update!
Front Panel Refinish The grain is really fine on the 'myrtle burl' wood - I ended up just applying several coats of clear lacquer and sanding: [Image: https://farm5.staticflickr.com/4311/3549...be6d_z.jpg] Next: two light coats of Mohawk Ultra Classic 'Light Golden Oak' (M100-0415) which brought the appearance closer to other examples of the MX cabinets that I've seen: [Image: https://farm5.staticflickr.com/4291/3613...86b6_z.jpg] A few more steps:
[Image: https://farm5.staticflickr.com/4422/3554...3f8d_z.jpg] The final result is that the bonus hole is no more! [Image: https://farm5.staticflickr.com/4418/3554...35ed_z.jpg] In a couple of weeks I'll rub out the finish - that should help give it a nice smooth and original looking finish. Side panel veneer As I mentioned earlier, I decided on 'pre-catalyzed resin' for applying the replacement veneer. From what I learned this is a good choice for thick veneer (1/16") - especially raw veneer (not backed by paper). The glue dries very rigid. I ordered the glue from Peachtree Woodworking Supply. [Image: https://farm5.staticflickr.com/4383/3633...3fe0_z.jpg] The glue is a powder that you mix 2:1 powder to water by weight. I used a drill stirring attachment to mix it well: [Image: https://farm5.staticflickr.com/4336/3620...6219_z.jpg] I used a foam roller to apply the glue - it did a good job of applying it at a good thickness: [Image: https://farm5.staticflickr.com/4349/3556...414b_z.jpg] [Image: https://farm5.staticflickr.com/4372/3598...ee1d_z.jpg] It ended up that there were still a few lumps in the cake batter! I removed those and smoothed things out again. I then carefully placed the sheet of veneer on top and clamped it down: [Image: https://farm5.staticflickr.com/4403/3637...234f_z.jpg] The glue sticks fast pretty quickly - but I had a minute or so to shift things around. The result: [Image: https://farm5.staticflickr.com/4385/3556...cd61_z.jpg] It came out nice and flat.  I then trimmed the excess using a veneer trimming tool (helpful on nice square edges like this): [Image: https://farm5.staticflickr.com/4391/3637...15dc_z.jpg] But now for the part that didn't go as planned.  The veneer I ordered ended up being about 1/16" short. I should have ordered it slightly larger of course - entirely my fault. I didn't want to reorder veneer as it's not cheap. I applied it as is, and plan to pad the slight gap with Timbermate or epoxy wood filler. It should be possible to obscure this small area using tone finish toner. Alternatively I could leave the gap as is - we'll see. [Image: https://farm5.staticflickr.com/4442/3556...21ea_z.jpg]
08-05-2017, 11:22 AM
I think it looks perfect my friend...
Dont go crazy over it...
Times I have been electrocuted in 2021
As of 1/01/2021
AC: 4 DC: 1
Last year: 6
08-05-2017, 12:00 PM
Thanks Kirk!
Yeah - it probably won't even be noticeable once the finish is on. That reminds me, this was stamped on the back: [Image: https://farm5.staticflickr.com/4401/3598...a90f_z.jpg] Maybe future generations will just blame Philco furniture plant 25. 

08-05-2017, 05:31 PM
Lookin' good Nathan!
08-05-2017, 09:41 PM
Thanks Bob!
 I won't post much on the electronic restoration - so I'll just add it here to this thread. 6.5K Resistor Part #60 - the large wire-wound resistor - tested open. After replacing it with the one from a parts chassis and putting in new electrolytics I tried bringing it up on a variac. No sound... Speaker Even though the speaker looked to be in really clean condition the output transformer tested open. Fortunately I have a spare H-13 speaker. And it lives! Actually it works pretty well but I'll still go through and restuff all the caps. Tuning Condenser After making sure it was mostly working I got to the root of the original problem - the one that resulted in an extra hole. I swapped in the tuning assembly from a parts chassis. It was also the perfect time to put in new tuner rubber mounting grommets. Before: [Image: https://farm5.staticflickr.com/4063/3488...3fd7_z.jpg] Note the addition of a shaft parallel to the tuning condenser axis. The original mechanism uses a pulley system to give much finer control. After: [Image: https://farm5.staticflickr.com/4432/3558...7fba_z.jpg] [Image: https://farm5.staticflickr.com/4417/3558...c469_z.jpg] [Image: https://farm5.staticflickr.com/4407/3635...bcea_z.jpg] (Tone control is out.) Shadow Meter The shadow meter tests good, although it doesn't move much. I verified that it moves correctly using a 9V battery. It will likely do much better after I restuff all of the paper caps and align it.
08-06-2017, 06:33 PM
Now back to the cabinet!
Sanding Sealer Today I applied the grain filler. Actually, I first sprayed two light coats of Deft Sanding Sealer to the whole cabinet. I let that dry then lightly sanded with 400 grit sandpaper. [Image: https://farm5.staticflickr.com/4337/3624...59c2_z.jpg] Grain Filler The veneer on this cabinet is mahogany - more on the brown side of things. Here's a reference picture of the original finish: [Image: https://farm5.staticflickr.com/4265/3533...5ab4_z.jpg] So I ordered some brown mahogany grain filler from Contantine's. It looks like they don't carry their own brand of grain filler any longer (until now I've only been using that in the walnut color) - instead they have this WoodPerfect grain filler product: [Image: https://farm5.staticflickr.com/4401/3636...63e9_z.jpg] Unlike the previous product this one doesn't require mixing or thinning. The consistency is almost exactly like frosting - or chocolate frosting in the case of the brown walnut color. I followed the instructions and it went on pretty easily. [Image: https://farm5.staticflickr.com/4343/3627...89ce_z.jpg] It filled the grain well - especially on the new veneer - with a single coat: [Image: https://farm5.staticflickr.com/4360/3636...d949_z.jpg] There's still a decent difference in color between the old and new veneer. I think that I should be able to even things up with an extra coat of toning lacquer on the sides. I've got some Mohawk 'Brown Mahogany' Ultra Classic on the way. [Image: https://farm5.staticflickr.com/4435/3641...dbec_z.jpg] 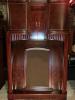
08-07-2017, 07:22 AM
Great job Nathan, I may try that glue also . Keep up the good work.
« Next Oldest | Next Newest »
Users browsing this thread: 1 Guest(s) |

|

|