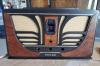
Actually, if you look at the data sheet I posted for the 71A, the bias required for maximum efficiency as an audio amp varies with the positive plate voltage applied. If the plate voltage is +90 volts, the grid bias should be - 16.5 volts. If the plate voltage is +135 volts, the grid bias should be -17 volts. Only when the applied plate voltage is the maximum recommended, +180 volts, should the grid voltage be -40.5 volts. I am not sure what the applied plate voltage is in this application.
In the Philco 86, the plate voltage is around 180 or more, so the -40 V bias applies. In comparison, at the same 180V plate voltage the 112A only requires -13.5 V.
You really can't measure the bias on the 71A's without them installed because the grid bias is developed mainly by the voltage drop across the power supply bias resistor. If the output tubes are not conducting, there will be little voltage drop and resulting low bias. The output 71A's provide the largest current drain on the supply and therefore the largest contribution to the bias voltage developed.
After checking all the wiring, I would install all the tubes and slowly bring up the AC with a Variac. Carefully monitor the voltages as you proceed.
I apologize for not responding sooner. Thanks for the inputs. Finally got back on the radio and hooked up all the caps, installed new P-P transformer, replaced the toggle switch. Turned it on hooked to variac without tubes and got it up to 110. all the filament voltages were ok. Next step I guess is to install the tubes. All of the 26 tubes were in the radio when I bought it years ago, checked for continuity on filament pins which are ok but dont know if they will work. (no tube tester). Got the new 71A's and a 27. Have to go back thru all of y'alls notes and hints to remember where to check the tube voltages. I try to keep a file with everything people post on this. Without all of the help yall provide this old man would be in serious trouble.
Thanks,
George
Voltages seem ok except 2nd RF, no voltage on plate. Looked harder and looks like the 2nd RF Coil has an open between the 100ohm resister and the wire to the plate. Looked even harder and it looks like someone had tried to repair it at some point. I guess to remove it, just unsolder and lift it out the bottom. I am not good with coils and could use some advice. Should have done better at checking things. I do get a hum from the speaker.
Thanks,
George
There's a couple of different ways to do it. One is drag a pin down over the winding and count the number of clicks. This will equal the number of turns.
Another is to unwind it and measure the length. Cut a replacement piece of wire the same length and wind it on.
Measure the width of the winding and wind a replace winding to the same width.
The fortunate thing is that it's not part of the tuned circuit so it's not super critical. It's there to transfer the rf signal from plate of the former stage to the grid of the next, supply the hv to the plate, and help match the plate load resistance.
It wouldn't be a bad idea to replace the celluloid strip under the winding and replace it with a strip of modern plastic. Somewhere around there's drawing w/measurements of it.
I would use 38Ga wire.
When my pals were reading comic books
I was down in the basement in my dad's
workshop. Perusing his Sam's Photofoacts
Vol 1-50 admiring the old set and trying to
figure out what all those squiggly meant.
Circa 1966
Now I think I've got it!
Terry
(This post was last modified: 12-08-2021, 09:21 PM by Radioroslyn.)
Thanks for all the info. Have been reading it again and again, I ordered some 38 and 32 magnet wire which wont be here till next week. Then I will try to rewind it. (Hope it comes out close to Morzh's, his looked really good.) Still more to learn.
George
By magnifying the picture of the coil to maximum and then counting the individual turns, my old eyes come up with 14 turns. Not sure that direction..cw/ccw matters on antenna or RF coils but is critical on oscillator coils!
Got the magnet wire and have spent two days trying to rewind this thing. Cut a piece of blister pack and cant seem to keep the wire strands close together. Dont know if it is my lack of coordination or experience or both. Anyway, I am still working on it.
right or wrong george, the way I did it was with 3M electrical tape instead of that plastic; wrapped sticky side out, and overlapped just enough to keep it secure. That way, the wire clings to, and stays put on the coil...
-Simon
Thanks for the suggestions, I appreciate any help. Went ahead and installed the RF after the last rewind try. No reception but here are the voltages I got.
1st RF pin 1-2 14v 1-3 -1.7v
2nd RF 1-2 39.2v 1-3 -2.1v
3RF 1-2 13.2v 1-3 -2.1v
Dect (27) 1-2 6.4v 1-3 1.4v 1-4 2.1v
1st AF 1-2 39v 1-3 -1.9v
The two 71A 1-2 72v 1-3 -15v.
One thing I havent mentioned is that the 1st Audio Tnsmr had a open primary so I rebuilt it just likek Ron did with his model 87. (100k,1Meg resistors and a .1uF cap). Wonder if the resistor values are to high for my 86.
I do get a scratchy sound when I turn the tuner.
Please help, I am knee deep in the swamp
George
Unbolt 7, 12, and 17. You'll see a bare wire solder to the bracket on it's bottom (ground). Cut it. Solder in a new .1 630v from the tab on the bracket (ground) to the tab at the other end with wire that goes to the rf coil. The issue is that the caps in these decoupling networks ( 200 ohm resistor and .1 cap ) are leaky and pulling down the hv line to the rf amps.
When my pals were reading comic books
I was down in the basement in my dad's
workshop. Perusing his Sam's Photofoacts
Vol 1-50 admiring the old set and trying to
figure out what all those squiggly meant.
Circa 1966
Now I think I've got it!
Terry
(This post was last modified: 12-17-2021, 05:25 PM by Radioroslyn.)
Thanks, Radioroslyn, I saw how Morzh replaced those on his post. I am out of stock on the .1uF caps so have to order some. I have found that if I replace too much at one time, I tend to have problems so am trying to fix one the next one. I do appreciate your response. Yall are a big help. I will post how it comes out after I get the caps.
George