Posts: 1,222
Threads: 50
Joined: Oct 2017
City: Allendale, MI
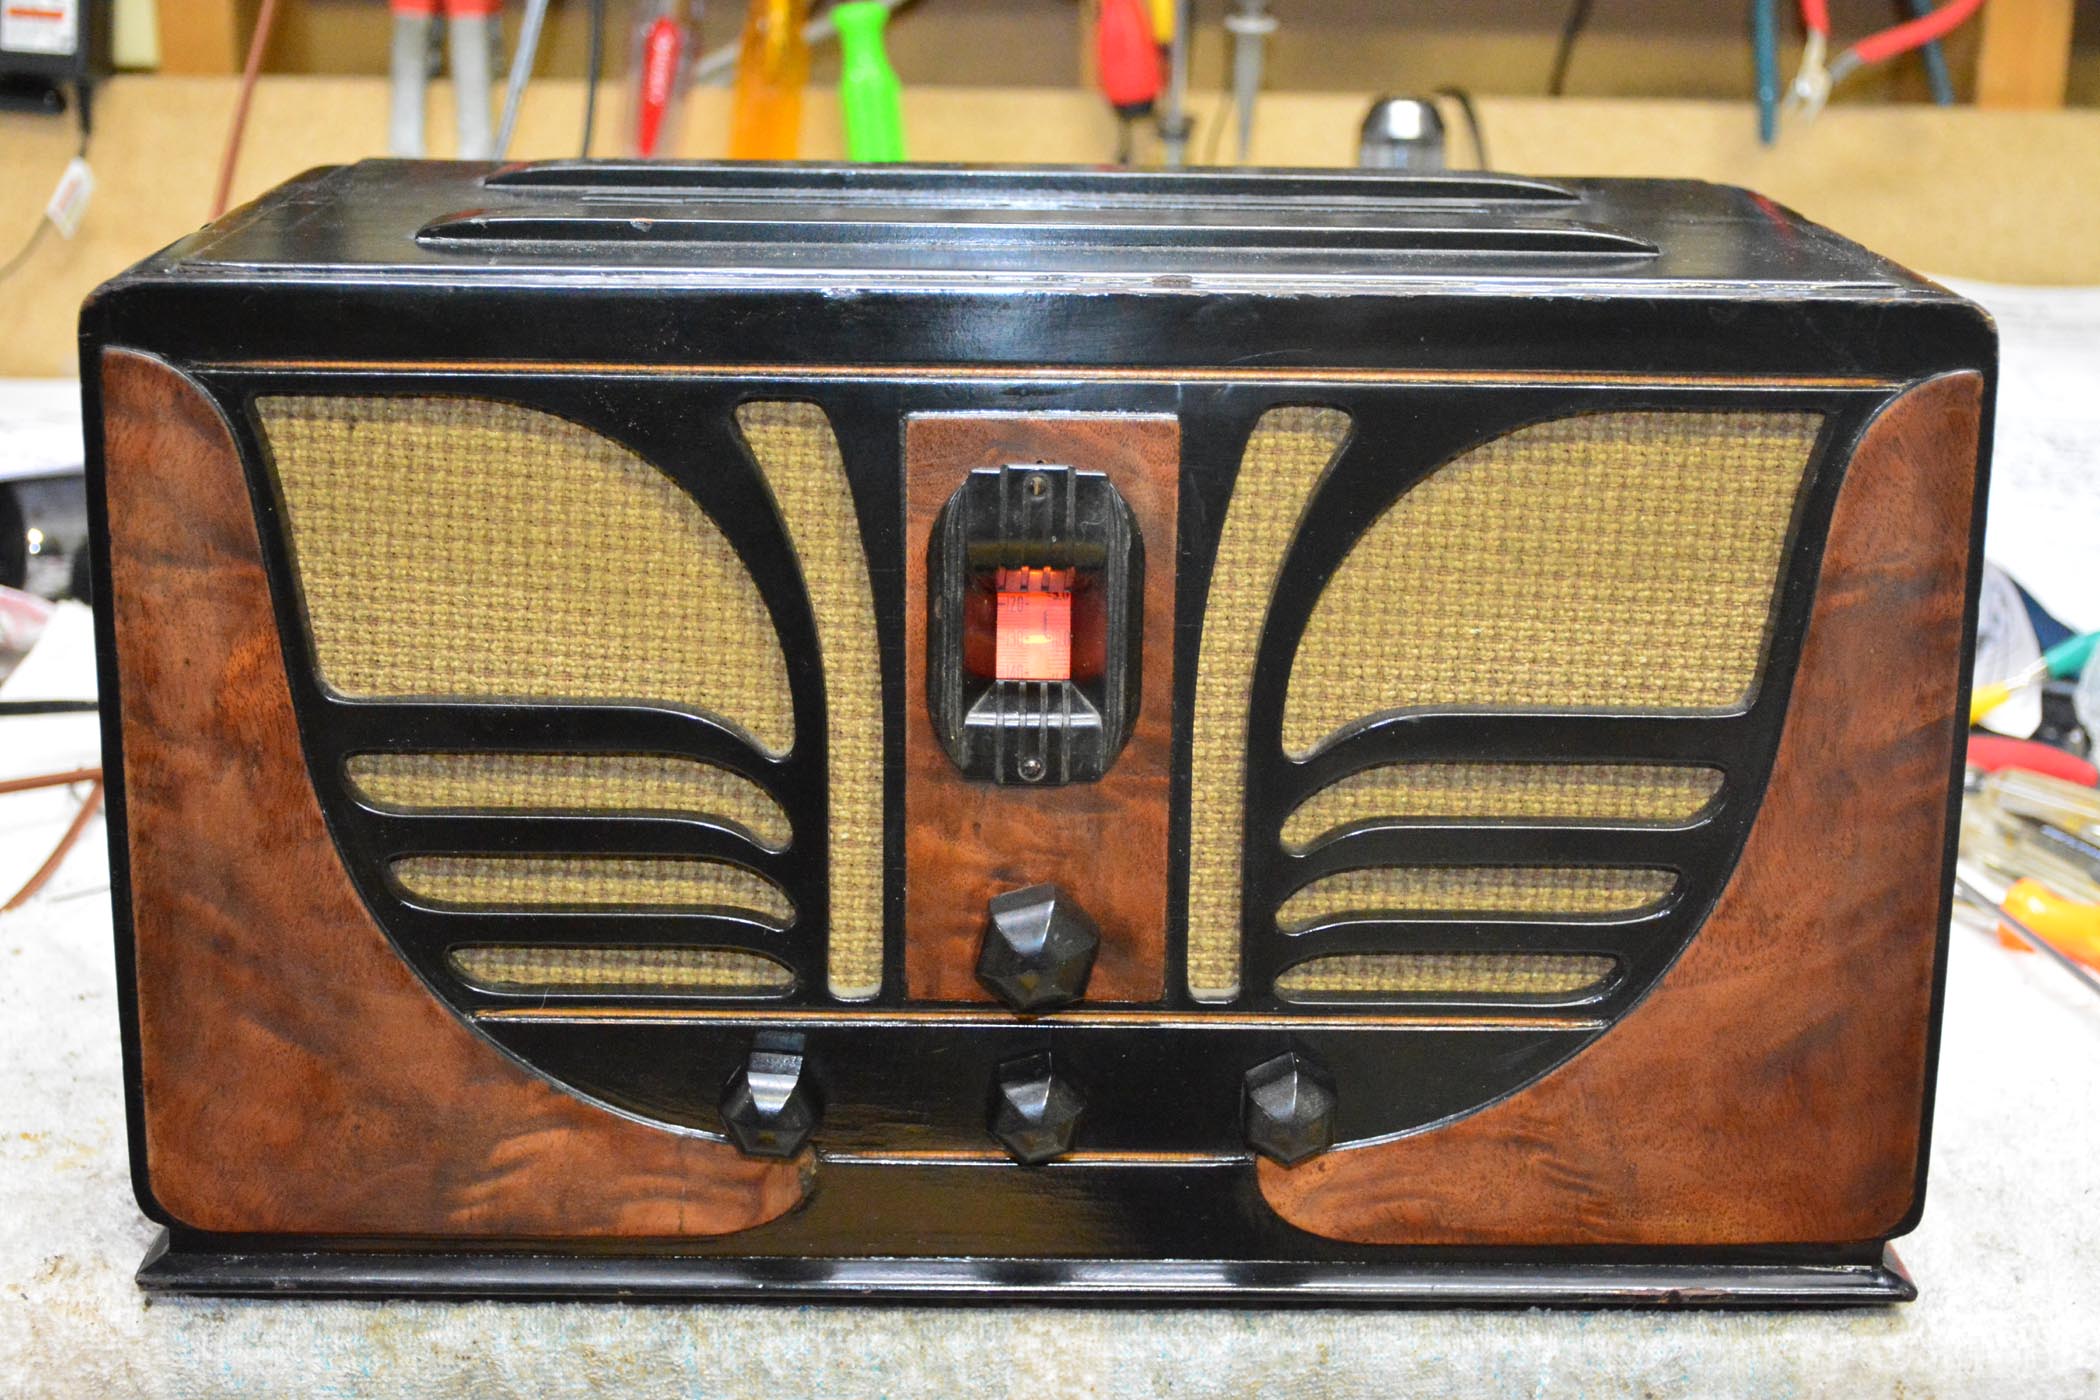
I decided to refinish my previously refinished in black Butterfly 45. The veneer on the front pieces is messed up and I want to replace it. Does anyone know what it is? it looks like burled walnut, but not sure. And, does that look like the original grille cloth?
Posts: 18,427
Threads: 622
Joined: Oct 2011
City: Jackson
State, Province, Country: NJ
Rob
It's not that obvious it's messed up.
Maybe up close.....but on the photo it looks fine.
It does resemble walnut, but I think natural cherry would look as good.
People who do not drink, do not smoke, do not eat red meat will one day feel really stupid lying there and dying from nothing.
Posts: 1,222
Threads: 50
Joined: Oct 2017
City: Allendale, MI
Yes, the photo looks better than the real thing. it has been sanded through in a couple of places and a piece was broken off and re-glued. And the panels are delaminating from the radio. So I'll have to do regluing anyway. With a little heat, I've already removed the panels since they were half off. I will try my hand at making new and veneering. I think it will be an interesting project. If it turns out lousy, I can always replace the original pieces. I have a piece of .8 mm ply that I used on my airplane. I'll use that as the backing for the veneer, use a shape following router to shape the pieces just like the original. I'll look at some cherry to see if I like it. The burled walnut I've looked at is a little too "figured".
Posts: 1,222
Threads: 50
Joined: Oct 2017
City: Allendale, MI
Posts: 18,427
Threads: 622
Joined: Oct 2011
City: Jackson
State, Province, Country: NJ
I never ventured in this realm........if you see me near a wooden structure that is taken apart - it is likely I fell on it.
People who do not drink, do not smoke, do not eat red meat will one day feel really stupid lying there and dying from nothing.
Posts: 1,222
Threads: 50
Joined: Oct 2017
City: Allendale, MI
Posts: 1,222
Threads: 50
Joined: Oct 2017
City: Allendale, MI
So did what little grain there is in the "white" wood and the plywood show through the Dark brown toner? Or, did they use an opaque toner that hid all of the characteristics of the wood?
Posts: 1,222
Threads: 50
Joined: Oct 2017
City: Allendale, MI
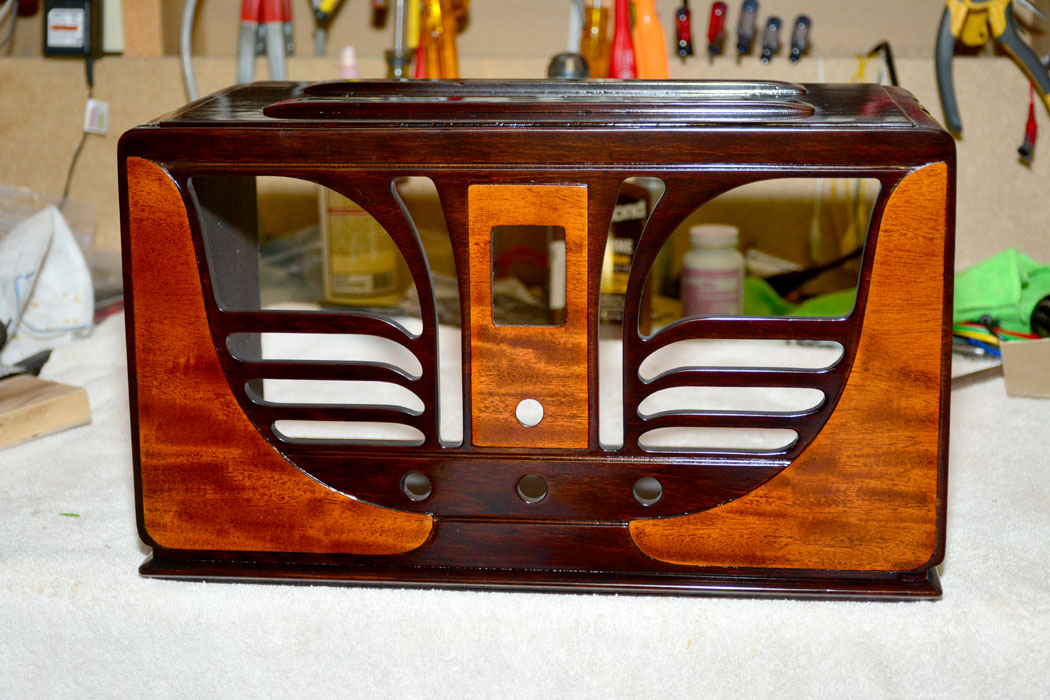
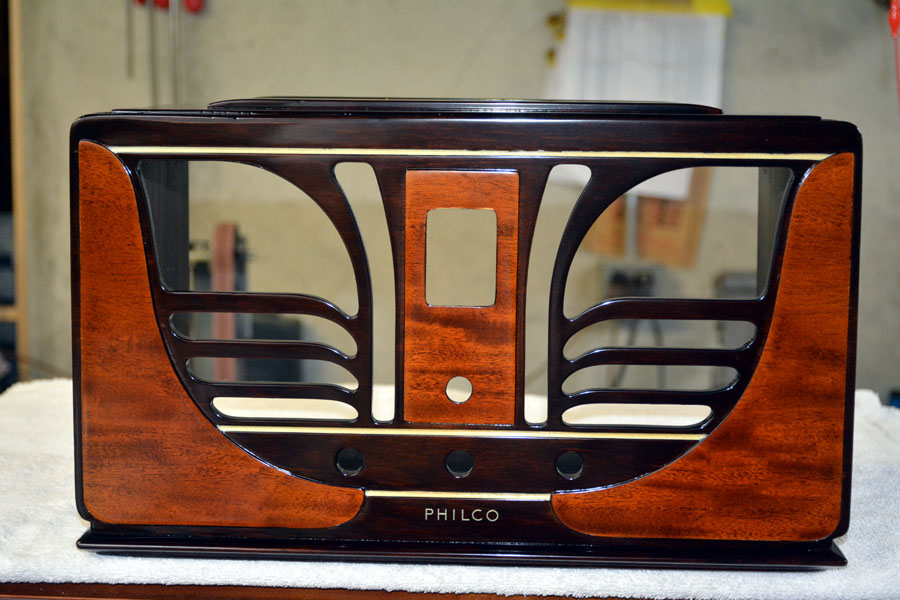
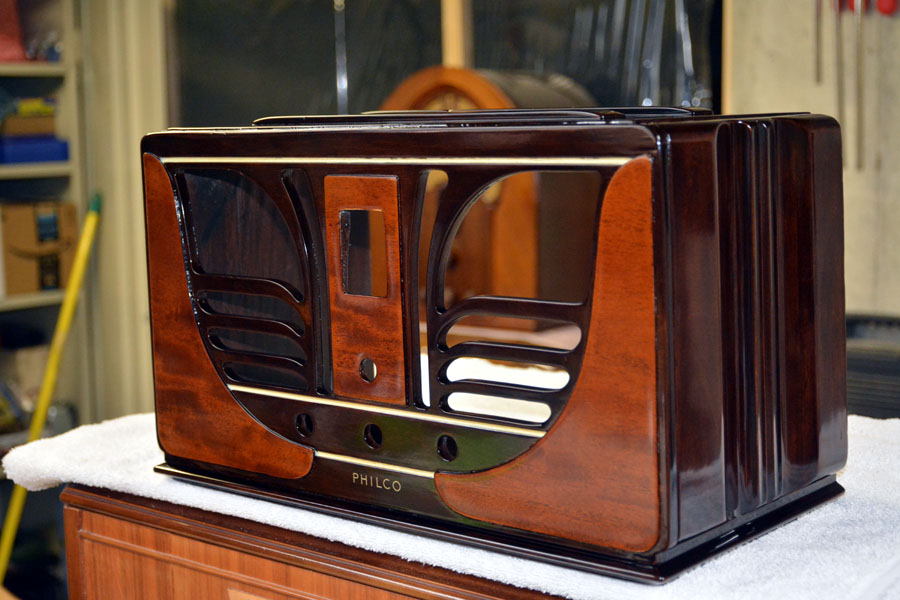
So, after stripping all of the black from the cabinet, replacing the decorative pieces, toning the cabinet with dark brown walnut toner and medium brown on the decorative pieces, here is the result so far. I had to use an air brush with the dark walnut toner to even out the finish before the final coats of toner. The cabinet turned out deep red-brown (red because the cabinet was quite red after the stripping process plus walnut brown toner tends to be a bit red). Medium brown walnut also turns out a bit red and the camera accentuates that, but on the whole it's ok. I hope it's not too far from original. I have to believe it is closer than the black paint that was on it previously!
(This post was last modified: 11-03-2020, 12:29 AM by rfeenstra.)
Posts: 1,222
Threads: 50
Joined: Oct 2017
City: Allendale, MI
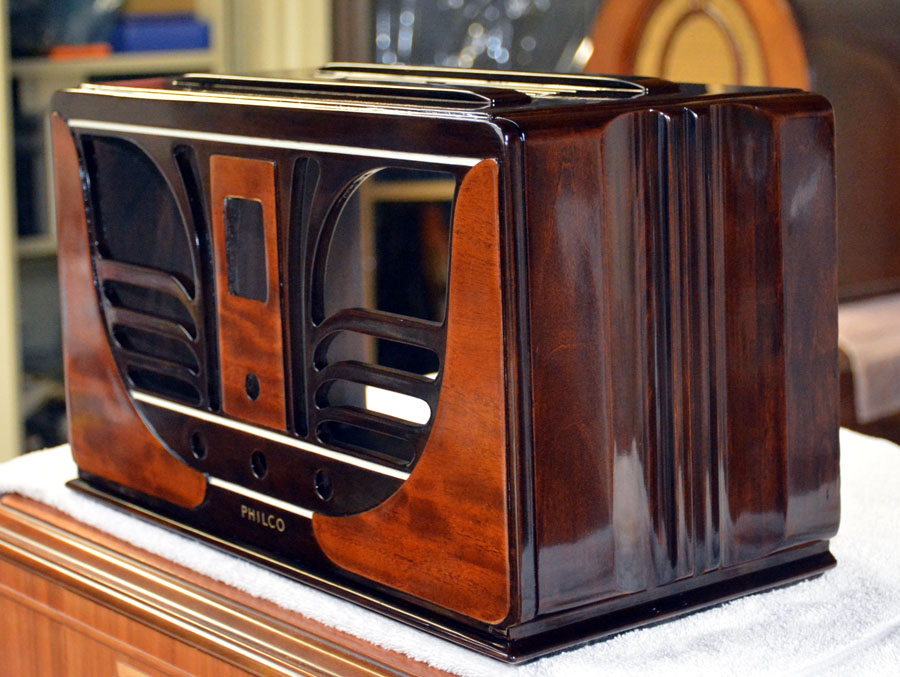
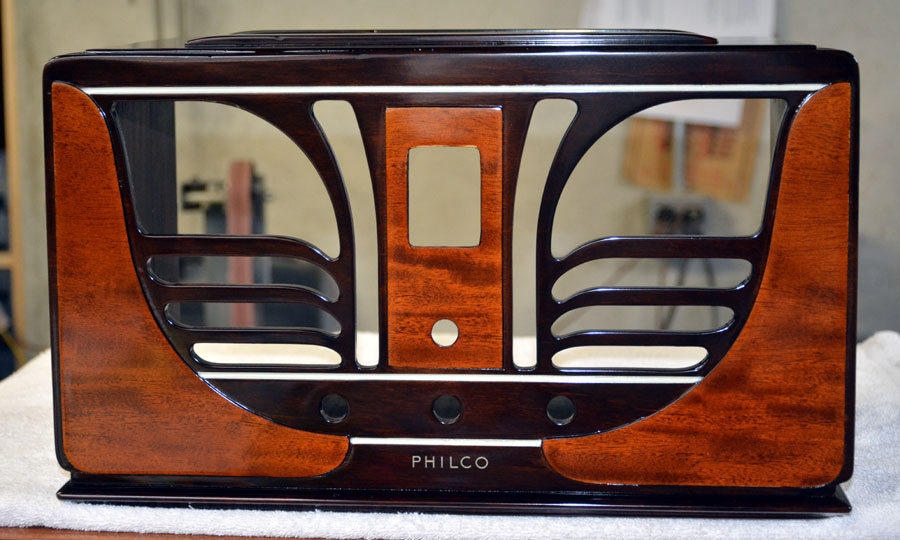
Hmmm. Mixed up some white, yellow and black fingernail polish. It looked good in mixing container but after on the radio, it is way to white to suit me. More sanding, mixing and spraying!
Posts: 4,832
Threads: 437
Joined: Jun 2011
City: Boston
State, Province, Country: Massachusetts
I recently saw one of these on a Perry Mason episode. In somebody's apartment. Your's is sharper too look at  .
Paul
Tubetalk1
Posts: 1,222
Threads: 50
Joined: Oct 2017
City: Allendale, MI
Thank you, Paul! I have redone the off white to a bit more yellow then "sprinkled" a bit of light walnut toner on it. Lacquer is drying now. I like it better but still may be a little too dominant. The original finish 45's I've seen on line have it more subdued. But, I can't keep putting lacquer on it! I think I'll live with it now. Pic will be coming.
Posts: 1,222
Threads: 50
Joined: Oct 2017
City: Allendale, MI
Lacquer has dried a bit. Here is the "toned down" trim color. This will be the final result.
Posts: 1,222
Threads: 50
Joined: Oct 2017
City: Allendale, MI
Posts: 120
Threads: 15
Joined: Aug 2017
City: Fort Worth
State, Province, Country: TX
That's a beauty! I have one with black paint and missing wire insulation caused by mice. I've been hesitant to start working on it; but, yours inspires me.
Posts: 4,832
Threads: 437
Joined: Jun 2011
City: Boston
State, Province, Country: Massachusetts
https://radioattic.com/item.htm?radio=1650432
Not anywhere near as nice as the one here in the Phorum.
Paul
Tubetalk1
Users browsing this thread: 1 Guest(s)
|
|
Recent Posts
|
|
54C Complete Teardown/Rebuild
|
| I don't think that I have encountered a 12Z3 before, curious how it uses one of those but includes a #43, which is a 25 ...Arran — 02:17 PM |
|
HiFi (Chifi) tube amp build - but my own design.
|
| It's the other forum. I'm also in DIY, but mostly read there. Honestly, I kinda jumped into this without much thought to...TV MAN — 10:43 AM |
|
Philco 71 Code 125
|
| Hello,
I am in need of a schematic for this radio. Mine has the three separate circular tube shields and a shadow me...dconant — 08:06 AM |
|
Stromberg Carlson 1500 Squeal
|
| And life just keeps getting more complicated.dconant — 07:57 AM |
|
54C Complete Teardown/Rebuild
|
| Hello Roy,
here is this one
sincerely Richardradiorich — 12:45 AM |
|
54C Complete Teardown/Rebuild
|
| Richard,
Had grabbed it already but thank you just the same. I find myself wanting to find some way to block out the...glyphmon — 12:03 AM |
|
54C Complete Teardown/Rebuild
|
| Hello roy,
here is a link to the schematic .
Sincerely Richardradiorich — 11:54 PM |
|
54C Complete Teardown/Rebuild
|
| Richard,
The Silvertone 2014 also is a transformerless set, so I am incorporating a 1:1 600 ohm audio isolation transfo...glyphmon — 11:37 PM |
|
Preliminary work on wife's Silvertone 2014
|
| Did an alignment today which was interesting. IF alignment went great, almost all was already spot-on. Adjusting on th...glyphmon — 11:35 PM |
|
54C Complete Teardown/Rebuild
|
| The main problem with adding a Bluetooth input is that this set lacks a traditional power transformer to isolate it from...radiorich — 11:19 PM |
|
Who's Online
|
There are currently 1690 online users. [Complete List]
» 1 Member(s) | 1689 Guest(s)
|
|
|

|
 
|