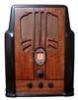
ÛPicked this working radio up at an estate sale. It's a cathedral. Since it was working, I'd thought I'd just recap and replace out of tolerance resistors. I've run into a problem I need advice on. The wax cap in the picture goes from Bakelite block #26 and ties into #2 pin in output tube #42. Where it sits is right behind mica cap #30. However, on the schematic and the base view drawing it clearly is not original and was added. I "thought" the caps in that Bakelite were mica. I ordered two 100pF@500V mica from Just Radios just in case they were needed to replace but ...now I'm wondering if it was added because the Bakelite block was failing and if so, did I get the correct replacements? I've never seen a wax cap installed to support a failing mica anyway. Any thoughts on this are greatly appreciated. The cap is marked 30-4024-m.
Thanks,
Mark
Another thought...perhaps it was added to booster the failing pot of the tone control, since that ties into pin 2 of the output tube. I was to replace those anyway. Perhaps they used th block as a ground?
Mark
Philcos from that era don't use tone control pots, if it has a pot, with a cap going to B+, it's been modified. The model 66 was a modified version of a model 60, with a proper shortwave band, the tone control was only a two position switch. If I were going to put a tone control pot in anything I would use one of the many circuits where you are NOT shunting a capacitor between B+ and ground through a pot, the cap shorts out, and BBQ's the tone control pot.
Regards
Arran
(This post was last modified: 02-01-2021, 04:29 AM by Arran.)
Hey Mark,
It appears the cap is attached to the ground terminal of the bakelite block. The other end is on pin 2 of the 42 which is the plate. I think the cap is there because there might be a problem with the tone control caps located inside the can of the tone control. I would remove the cap and replace the ones in the tone control can.
It's a pot of tar and it's been added on as you can see from the electrical tape. The blue wire goes to pin 2 of the output tube #42. On the schematic it shows 2 caps which are described in the schematic parts list as "Condensers in Tone Control". There is only one contact post on the tone control and after I get the tar out of it I'll take a closer look at that glob of solder which I'm wondering is a grounding point. The other picture is a proposed sketch of how I planned to replace those two caps. At this point I'll assume when the new pot was added it needed that "extra" cap I originally referenced and asked about. If I follow the schematic and replace the correct value caps which I have, I would then remove that extra cap (30-4024-m). If all this sounds kosher, is the proposed wiring diagram right?
Thanks,
Mark
Looks good, as capacitance is added to the circuit through the tone switch the effect is to filter off some high frequency audio giving more bass to the output transformer. It goes from 0.002mfd to 0.022mfd. I wouldn't go any higher, you may start to lose some lows and volume.
Thanks! The last thing I'm questioning is voltage. I ordered two brown dip caps@630v. For the tone control caps. Let me know if you would have done different.
Appreciate the help,
Mark