Posts: 18,427
Threads: 622
Joined: Oct 2011
City: Jackson
State, Province, Country: NJ
Today I realized there's no way around it, and started removing things from the top.
I labelled all the caps, coils, amps and started desoldering them.
Under the caps there was some real dirt I could not get out before, so I applied more Goop and cleaned it.
I too apart one cap, and realized there is no need: it is as clean inside as on the day it was built. But I will have to re-jacket the wires, for which I ordered some heatshrink of the proper diameter, which will come tomorrow.
I have some photos (I take both the one for just showing whta it is like, and the ones to remind me how things were before they were removed). I will publish them later when I am done with the removal/cleaning part.
People who do not drink, do not smoke, do not eat red meat will one day feel really stupid lying there and dying from nothing.
Posts: 3,189
Threads: 226
Joined: May 2008
City: Omak
State, Province, Country: WA
Hello mike,
Yep, Sometimes I like dragging my feet to like with my Philco 38-10T.
Paul Yes great products !
Sincerely Richard
Posts: 18,427
Threads: 622
Joined: Oct 2011
City: Jackson
State, Province, Country: NJ
So, some removal and some cleaning.
Taking the parts out, obviously, take some desoldering.
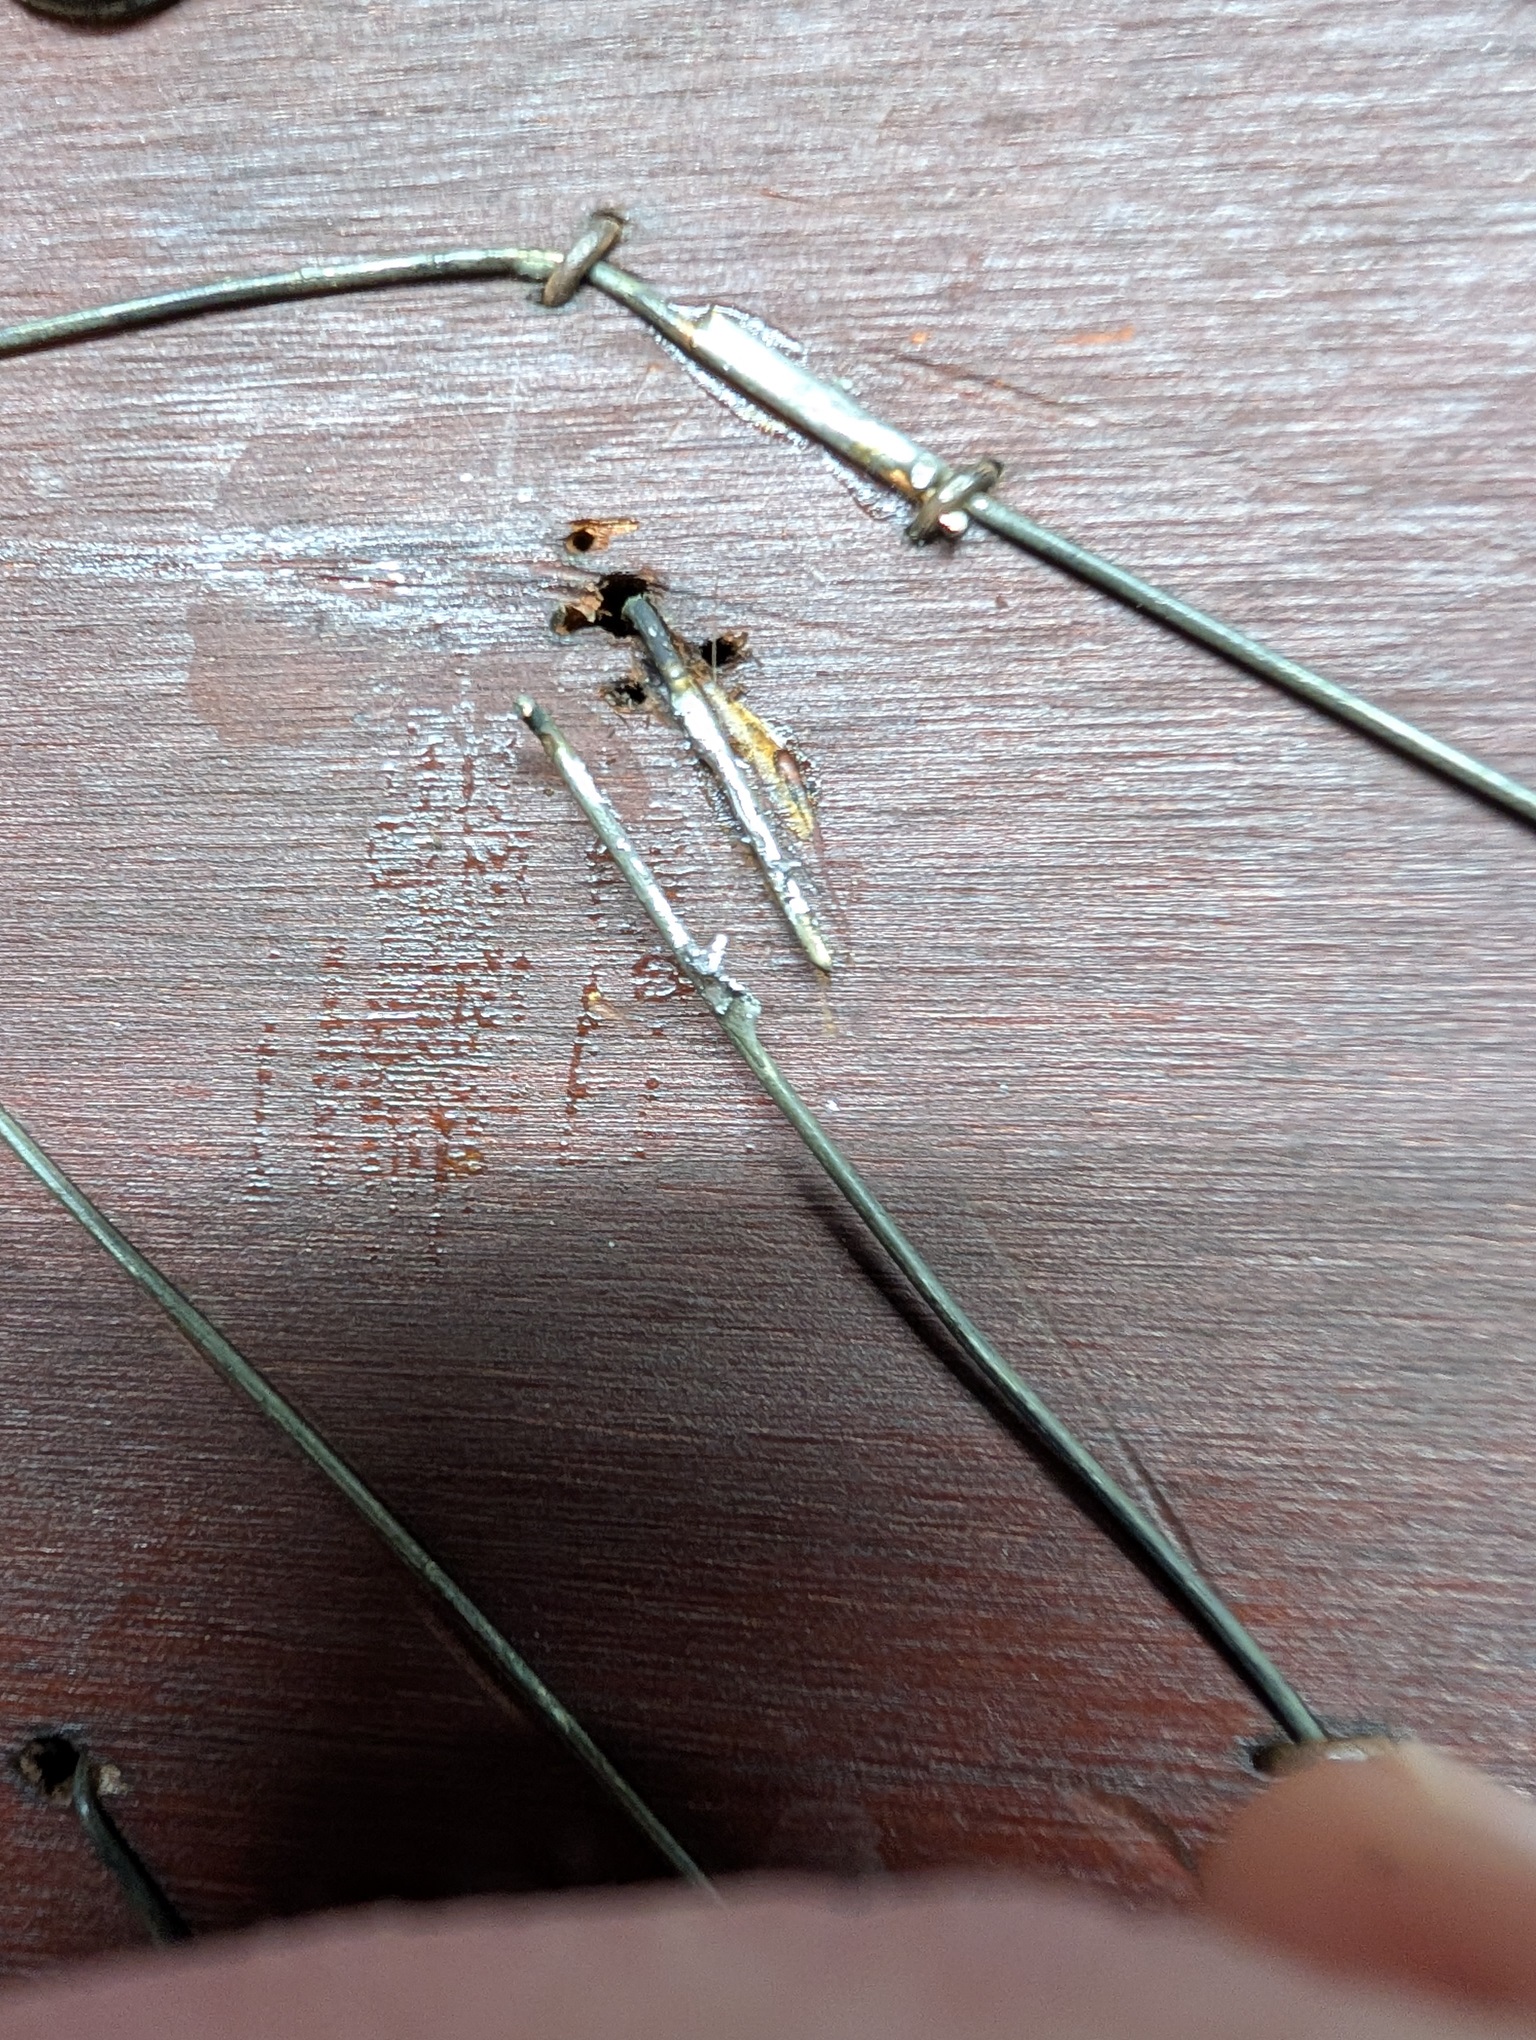
I use the bamboo skewers from grocery shop to separate the wires upon melting the solder.
Like so:
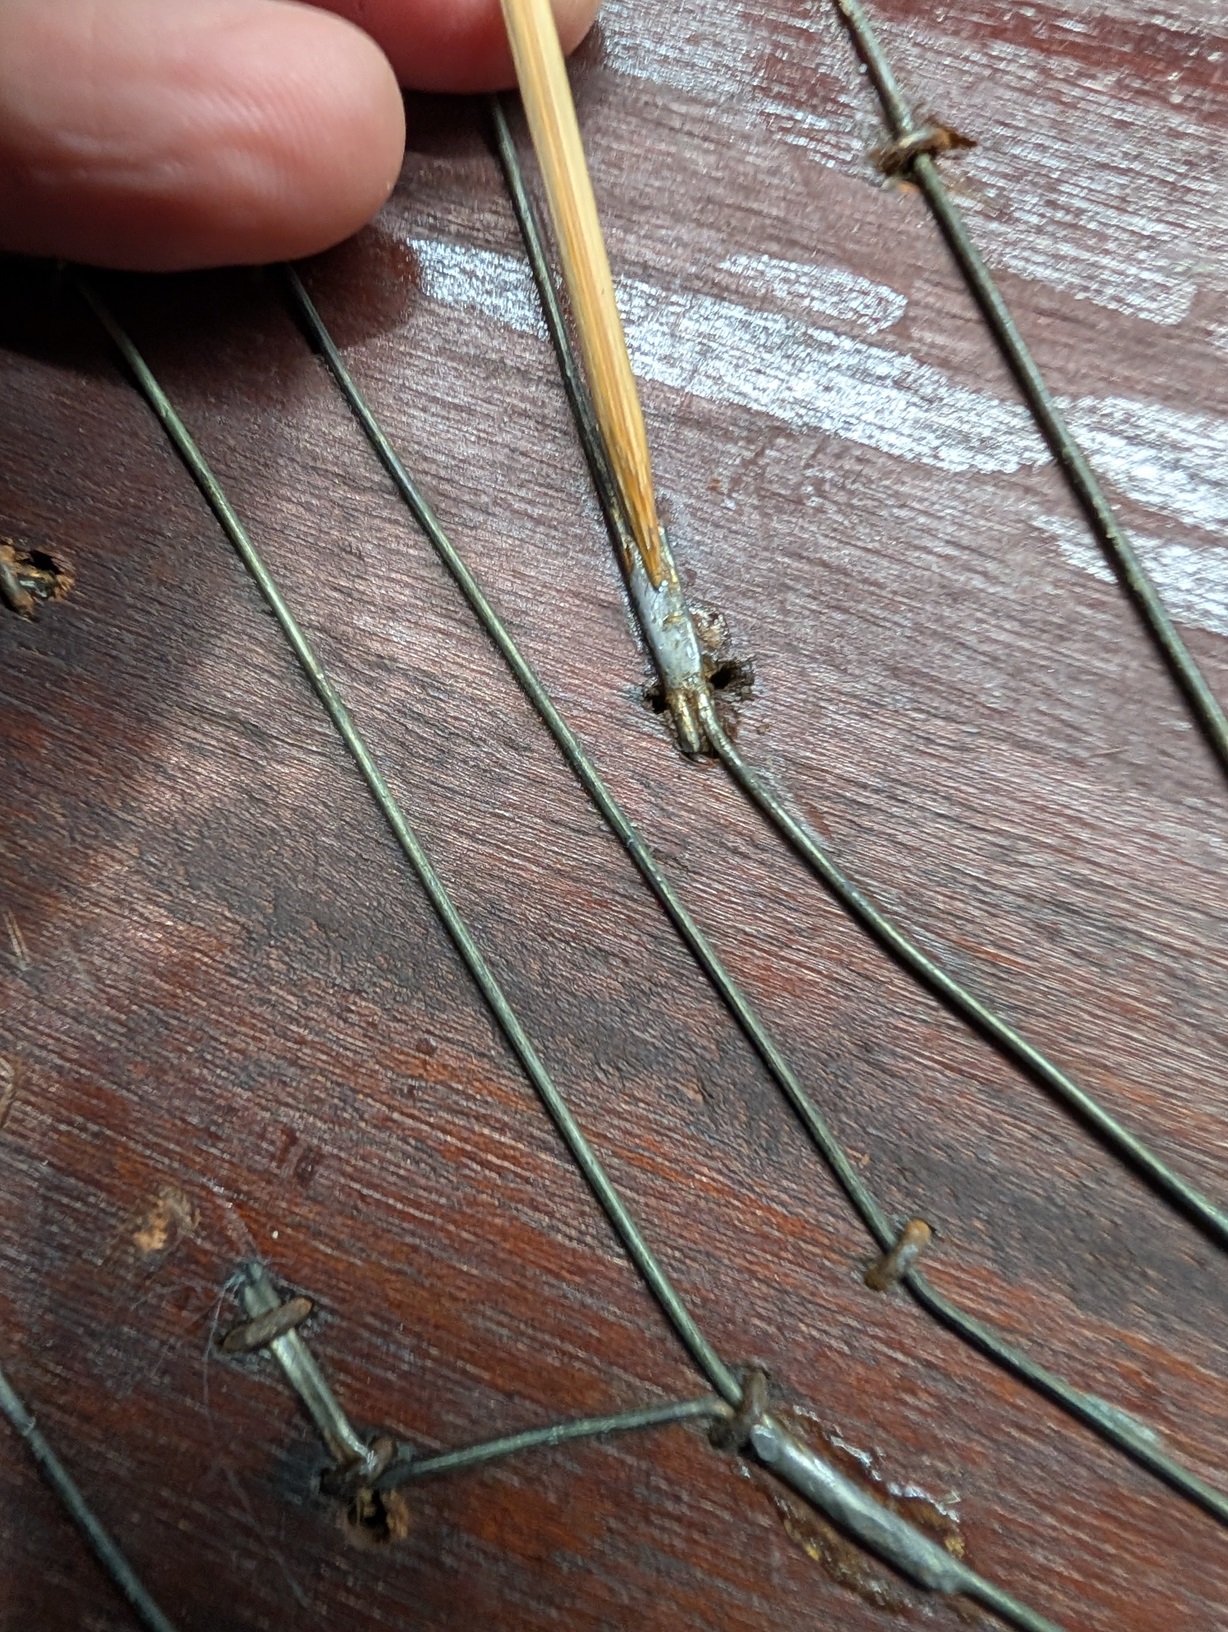
They then come apart easy and don't re-solder by themselvs.
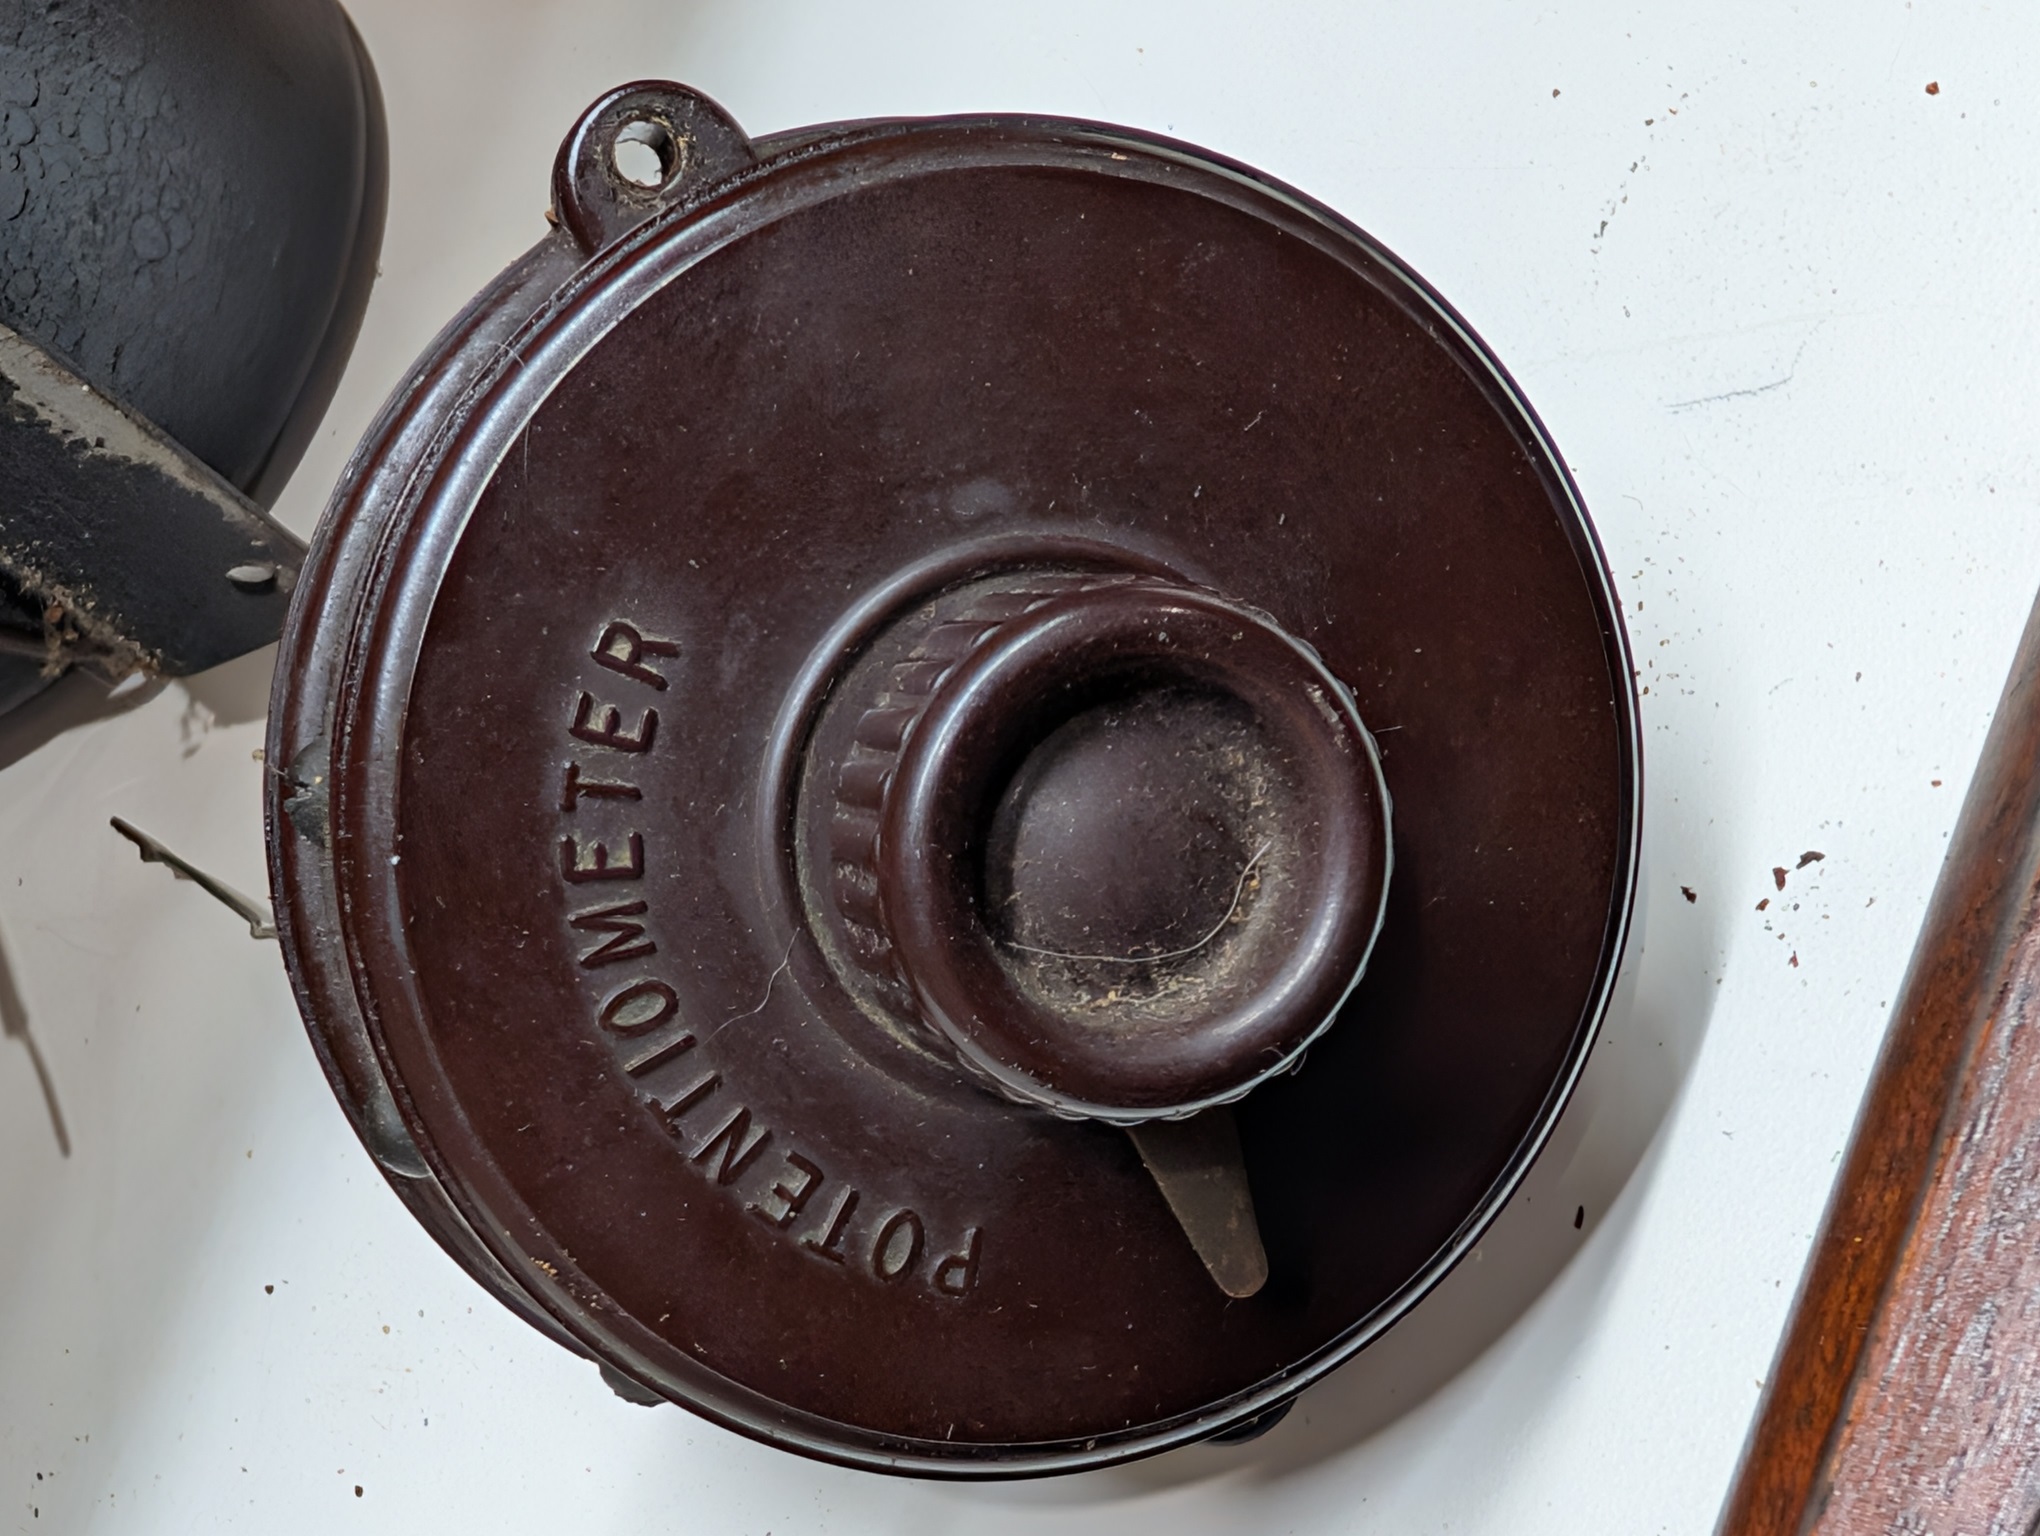
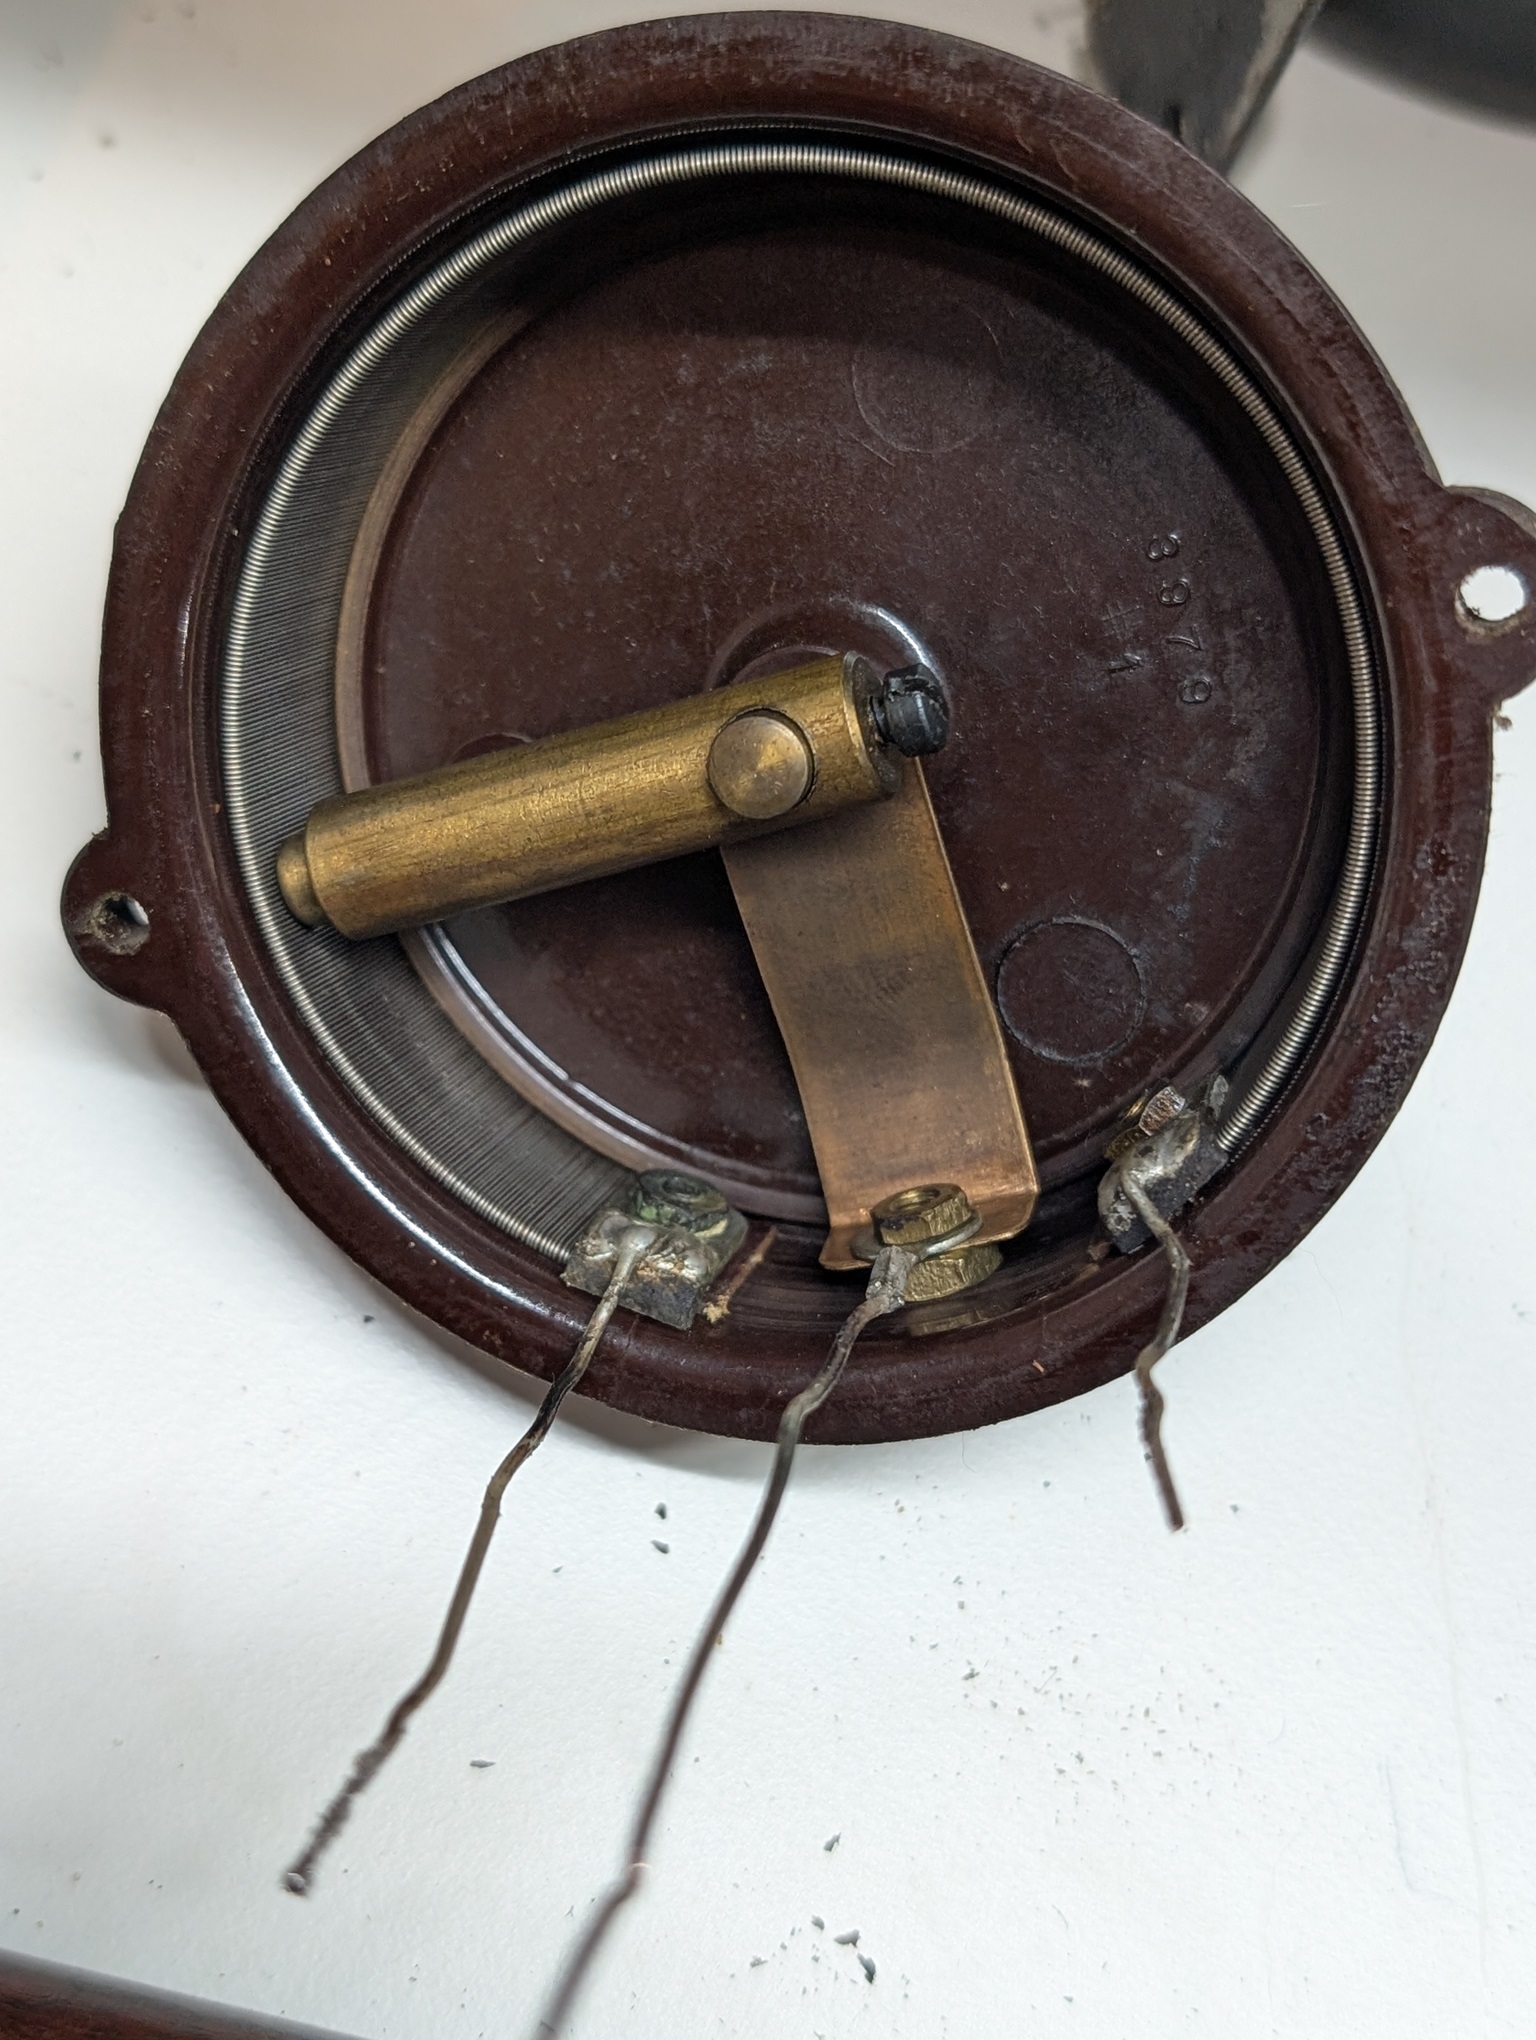
This is the potentiometer: this one could use some contact cleaner used judiciously.
Then I opened the variable caps and re-insulated the wires. The insides otherwise are very clean.
I also made sure the spring contact makes contact with the case, which it did very well.
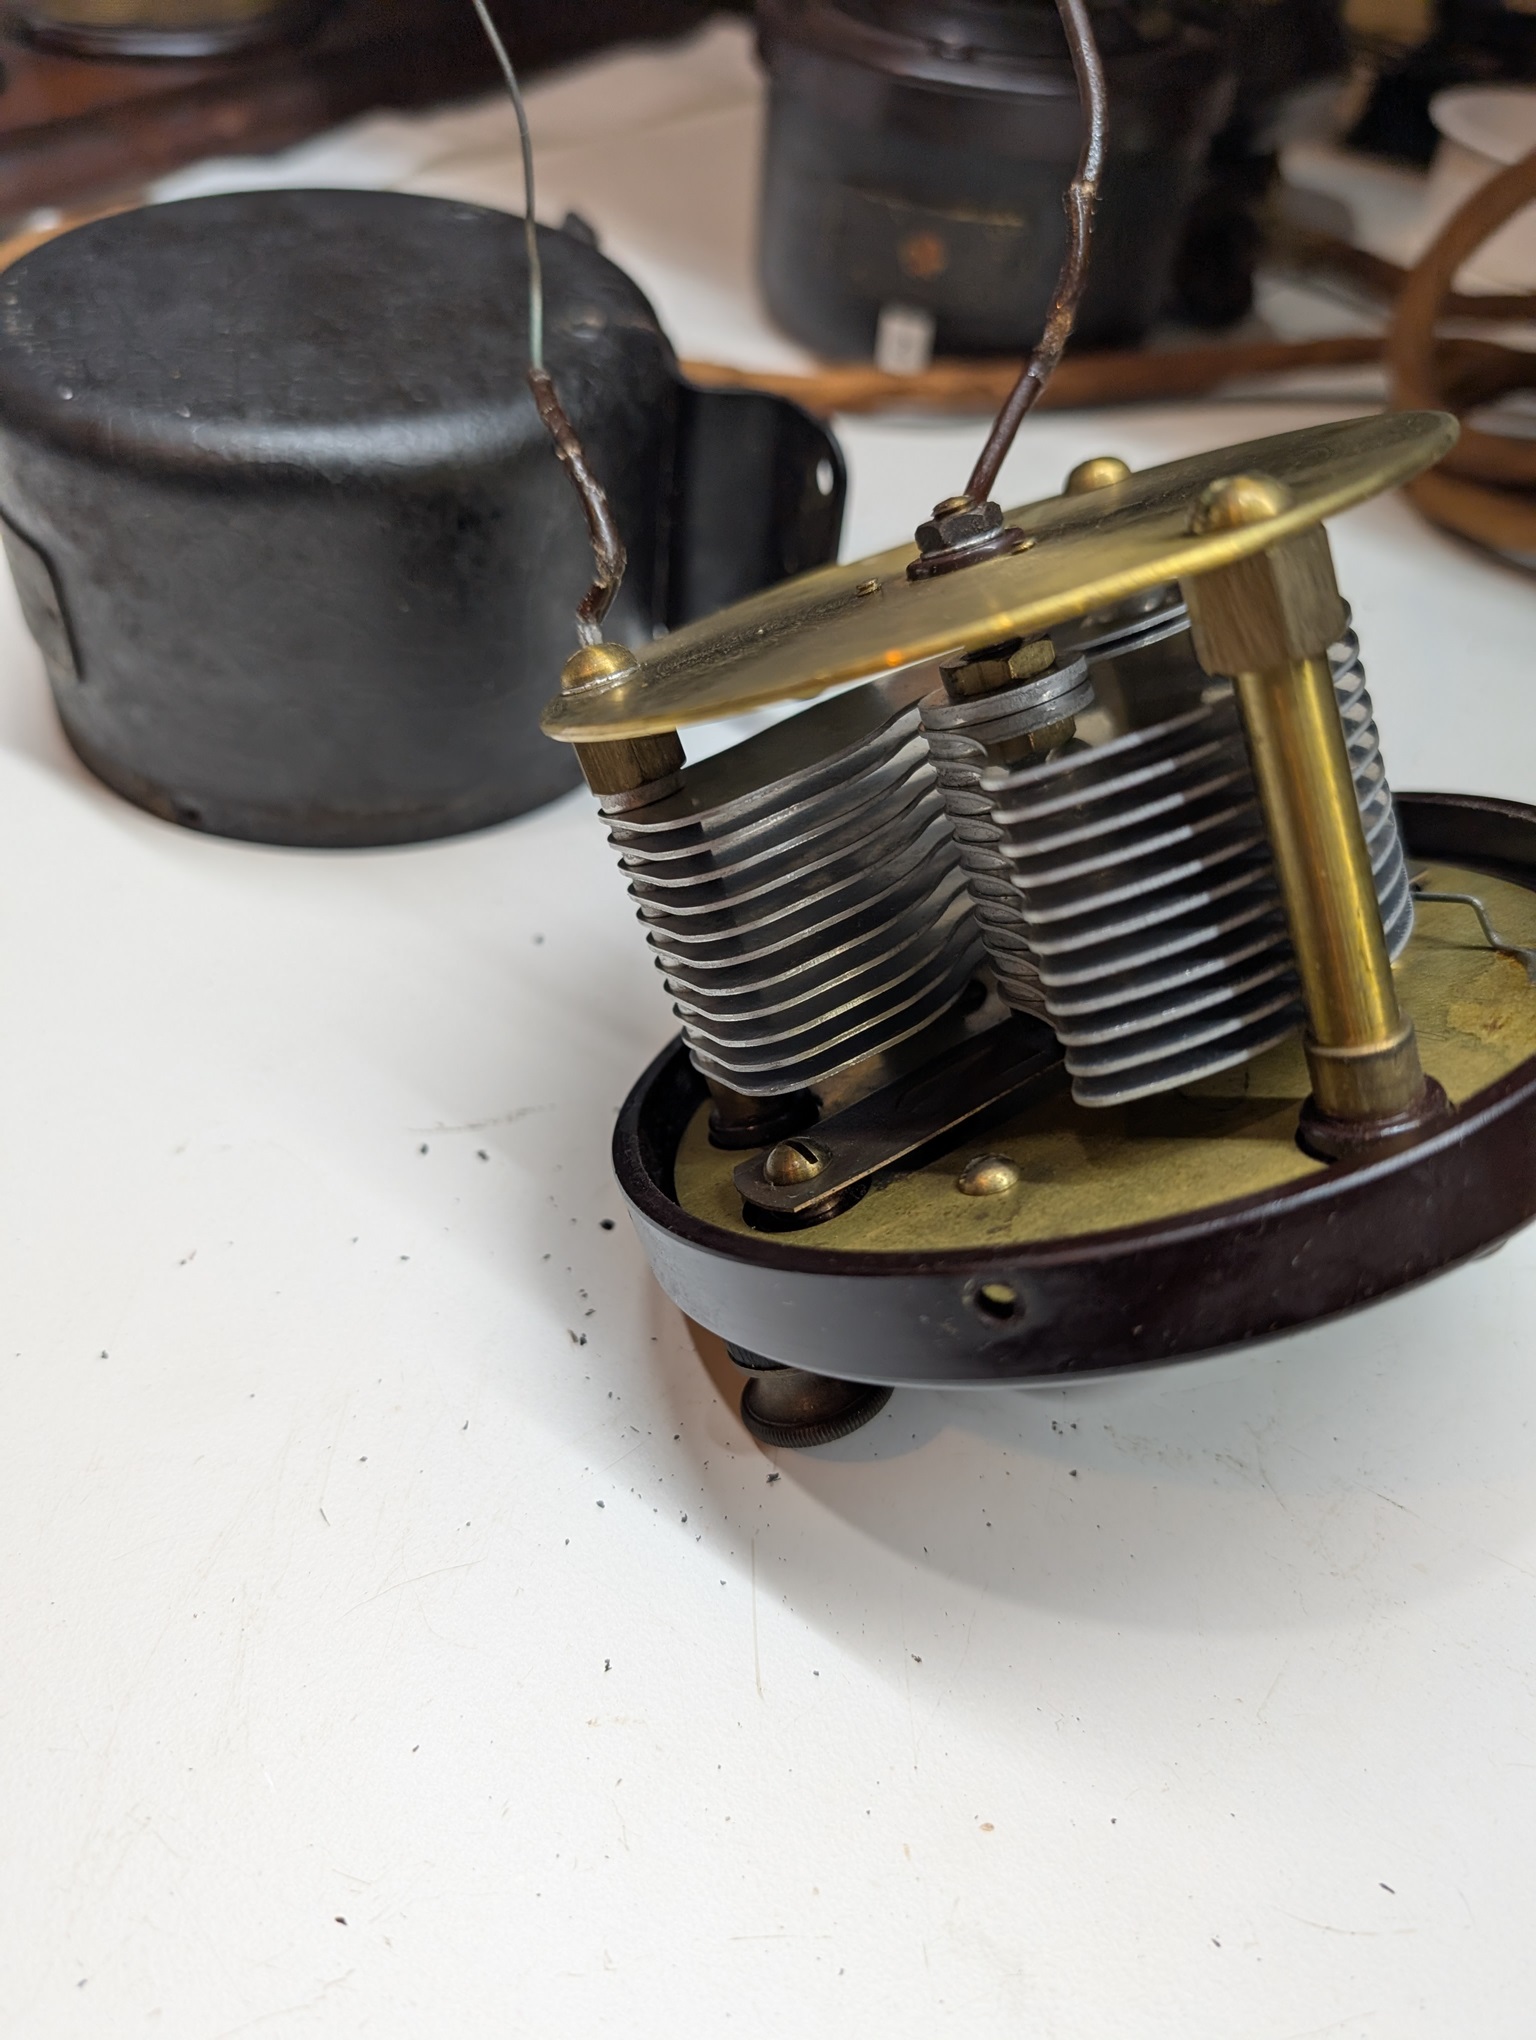
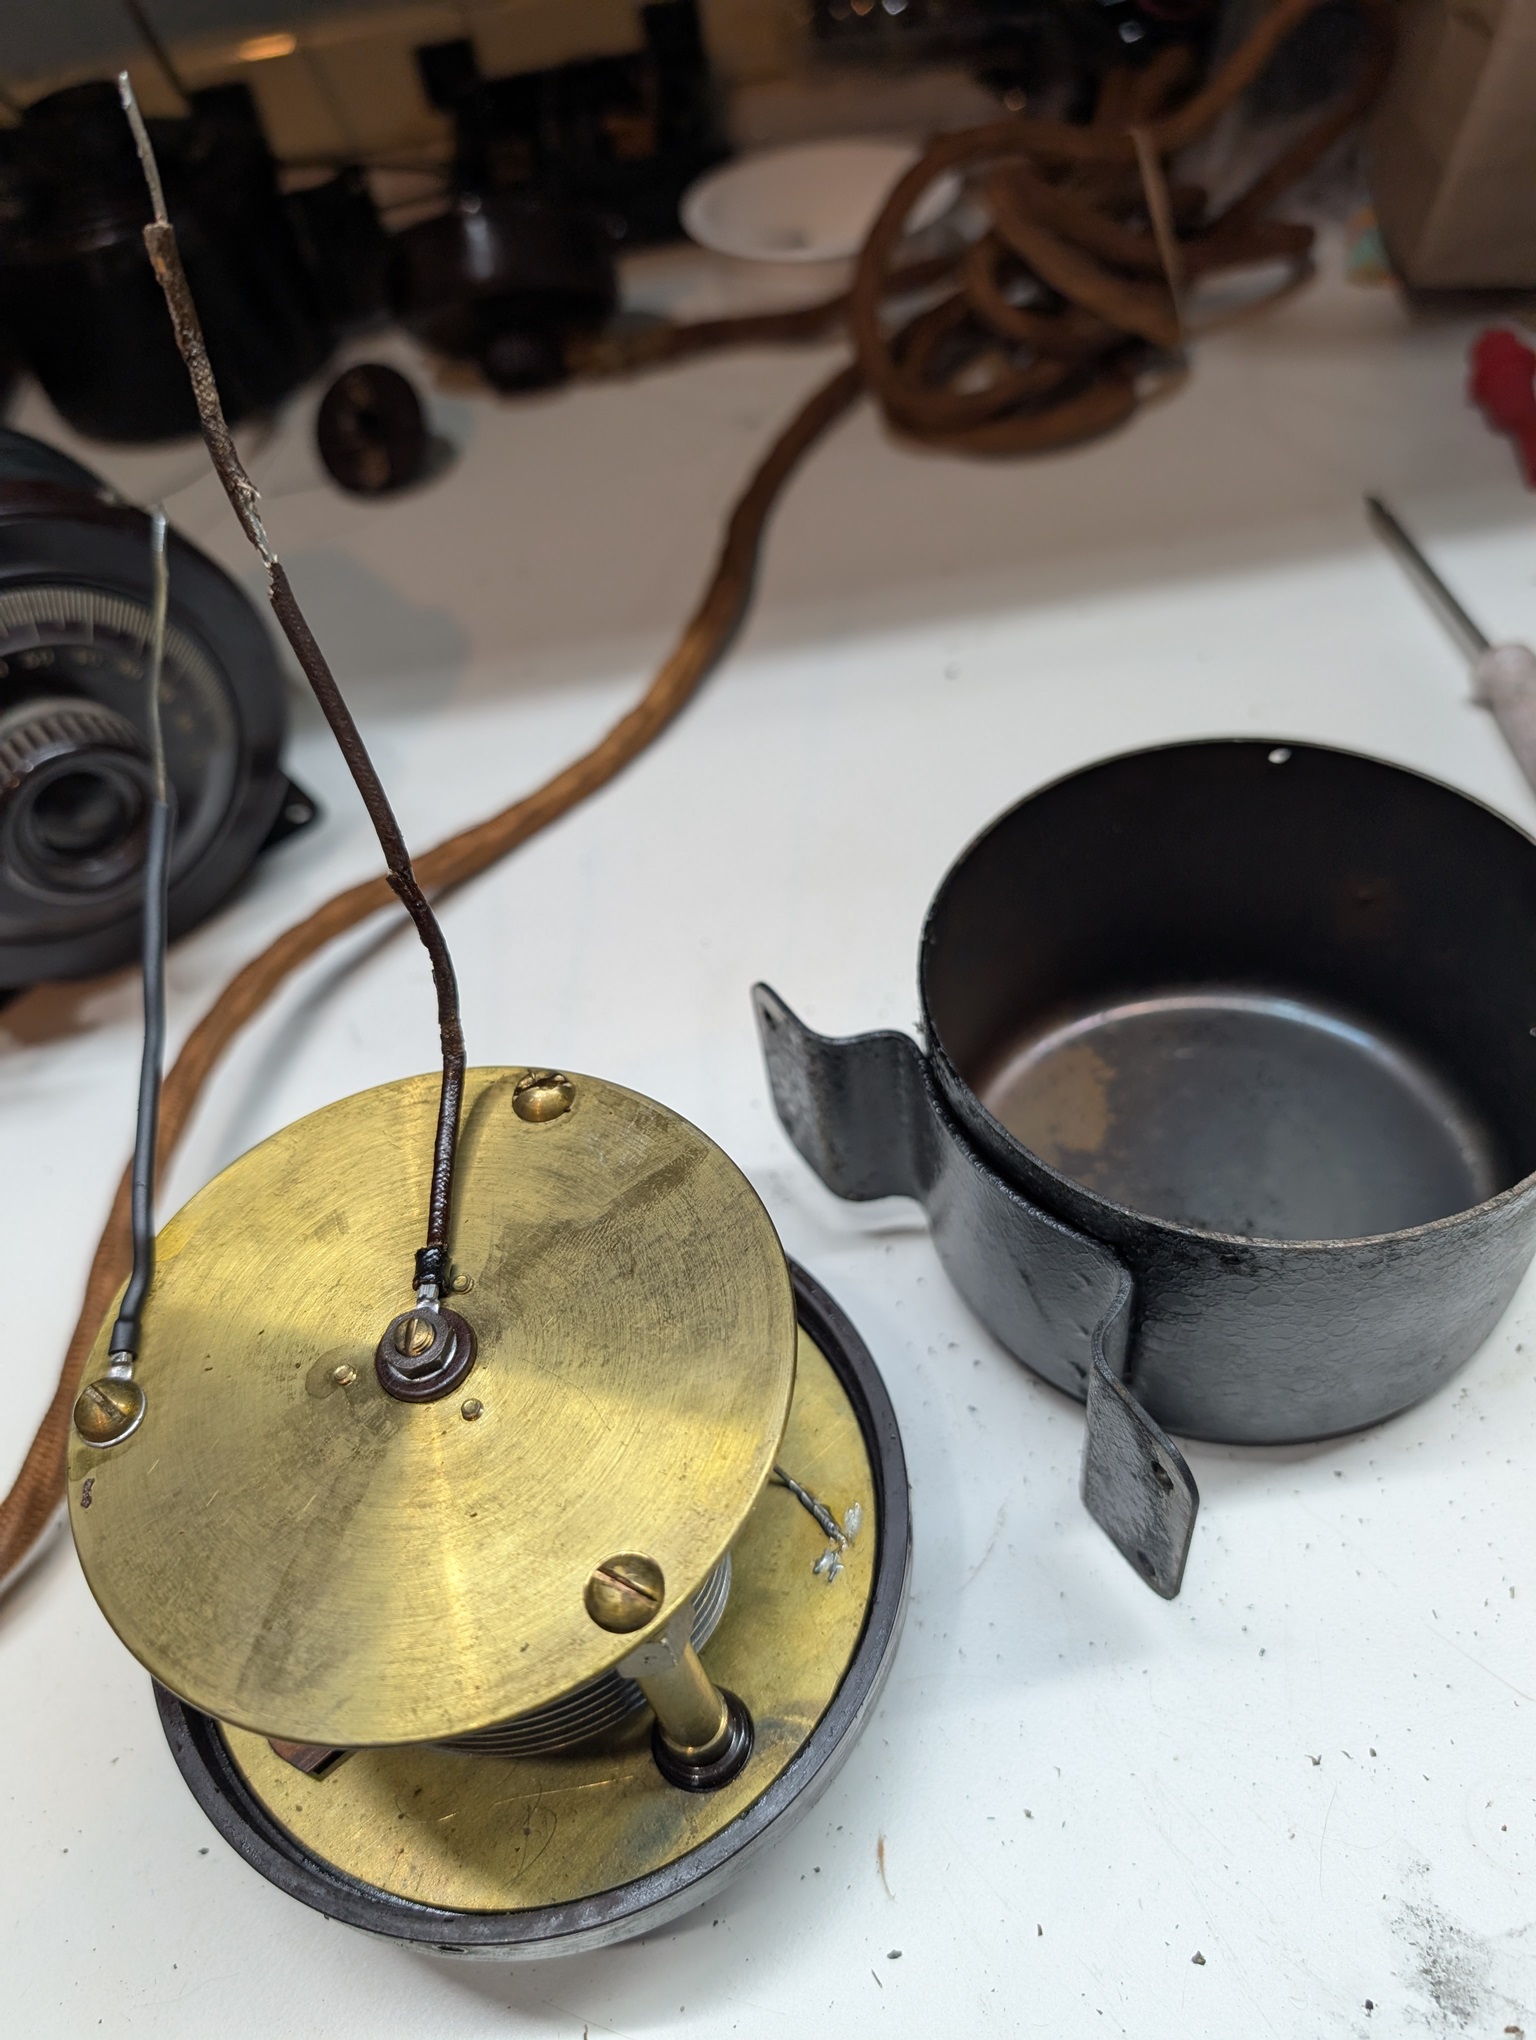
Then heatshrinking the wires:
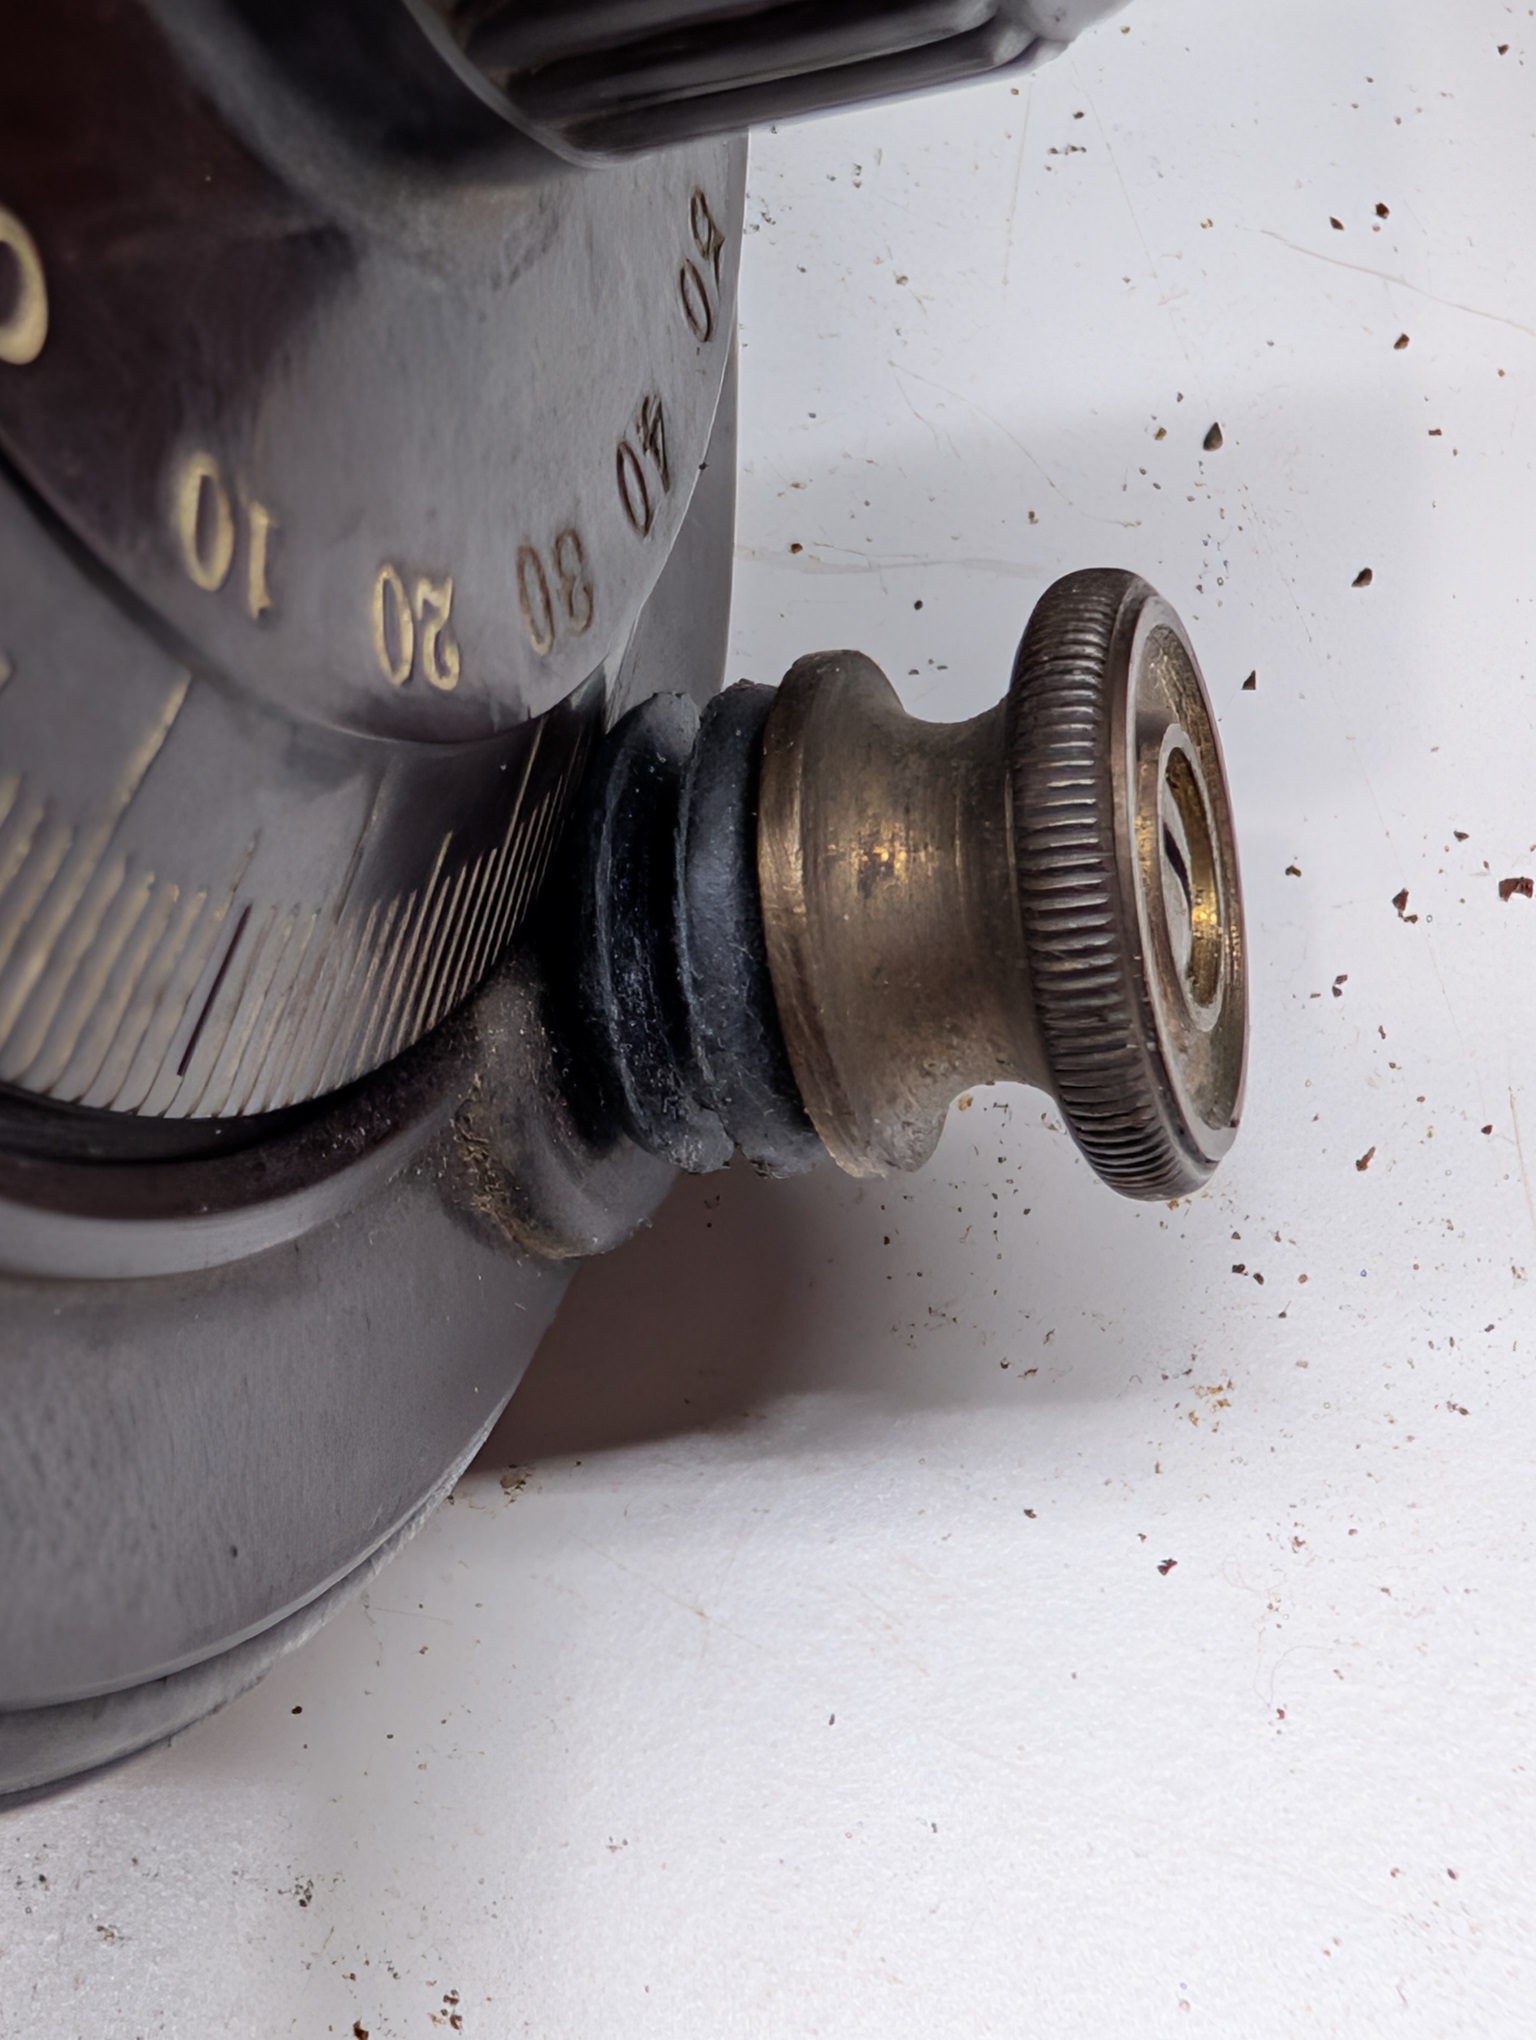
And I used rubber grommets with rounded edges to make the tires for fine adjustment knobs.
When a better one becomes available, I will put them in. It is easy.
People who do not drink, do not smoke, do not eat red meat will one day feel really stupid lying there and dying from nothing.
Posts: 18,427
Threads: 622
Joined: Oct 2011
City: Jackson
State, Province, Country: NJ
Re-insulated all three tuning caps.
Now removing the coils.
The coils' wire is fully discolored. I saw that Glass Slinger person paining it with some gree oil color. Could work too.
Two out of three coils had a breakage at the last turn that goes inside to the posts and it was repaired. The repair somehow oxidized (though remained fully conductive) so I re-tinned it.
But...I do not want to rewind it, though I have some excellent litz - it won't take the color; but I am thinking if someone still makes silk-insulated magnet wire. Back in the old country as a kid, I saw it (thinner; the designation was "ПЭЛШО" - PELSHO, standing for "Провод Эмалированный Лакостойкий в Шелковой Оплетке" - Wire, Enameled, Lacquer-resistant, in Silk Jacketing) and the color of silk (yes, true silk) was either Navy Blue or Bright Green.
Need to remove one more coil, two amps and the board will be bare.
PS. They seem to either still make the wire or it is old stock? Plenty of links. PELSHO litz.
https://kabelgarant.ru/emalprovod-v-shel...o--015-mm/
People who do not drink, do not smoke, do not eat red meat will one day feel really stupid lying there and dying from nothing.
Posts: 2,327
Threads: 23
Joined: Jul 2020
City: Greenlawn
State, Province, Country: NY
Hi Morzh,
I have one A-K 4700 Model 10C (for Pooley Cabinet), one Model 20 (Big Box) one Model 20C and one 20C chassis. All of the wire on these is rather neutral, likely due to exposure in the case of the 10, unknown as to why on the 20s. I also have a FADA 165 (unknown if factory or kit, but assembly was extremely professional) in unbelievably pristine condition. The coils are perfect with green Litz wire.
Below is a link to a Model 10 A "Radiodyne" from "Phil's Atwater Kent Breadboards":
https://www.atwaterkent.org/model-10-4340
And to the home page for the site:
https://www.atwaterkent.org/
This appears to be a near museum quality example. The Litz wire on the coils appears to be rather neutral.
Click on the Articles section of the website. There are fantastic reprints of the Mid Atlantic Antique Radio Club (MAARC) Journal articles with everything having to do with A-K Breadboards, written by Ray Thompson and Leigh Bassett. The articles on TA Units have fantastic "modern" diagrams.
Disassembly of one of the RF coils is rather simple, and if the primary (inside coil) is wound with the same material as the secondary (outside coil), the fact that the primary coil was shielded from light, dust, mouse )!$$, etc., may guide you on wheat is the authentic color for the wire.
Hope this helps.
"Do Justly, love Mercy and walk humbly with your God"- Micah 6:8
"Let us begin to do good"- St. Francis
Best Regards,
MrFixr55
Posts: 18,427
Threads: 622
Joined: Oct 2011
City: Jackson
State, Province, Country: NJ
MrFixr
Yes, the disassembly and, probably, the rewind, ,if needed, would be very simple.
The wire color is neutral.
Some folks say it was green initially. I might try to look at the inside coil to see what color it possibly was.
But the wire is not a litz. Even though I've seen some places calling a silk-insulated solid wire a litz, litz is by definition multy-strand, with each strand insulated with varnish to prevent skin-effect. This wire is a solid core type. Actually made it easier to twist and solder where it broke.
This is a litz I have. I still have two bobbins at work, but many are back home as they at work suggested discarding it, and I told them I'd rather take it for myself. Crazy. Each bobbin is a few hundred bucks.
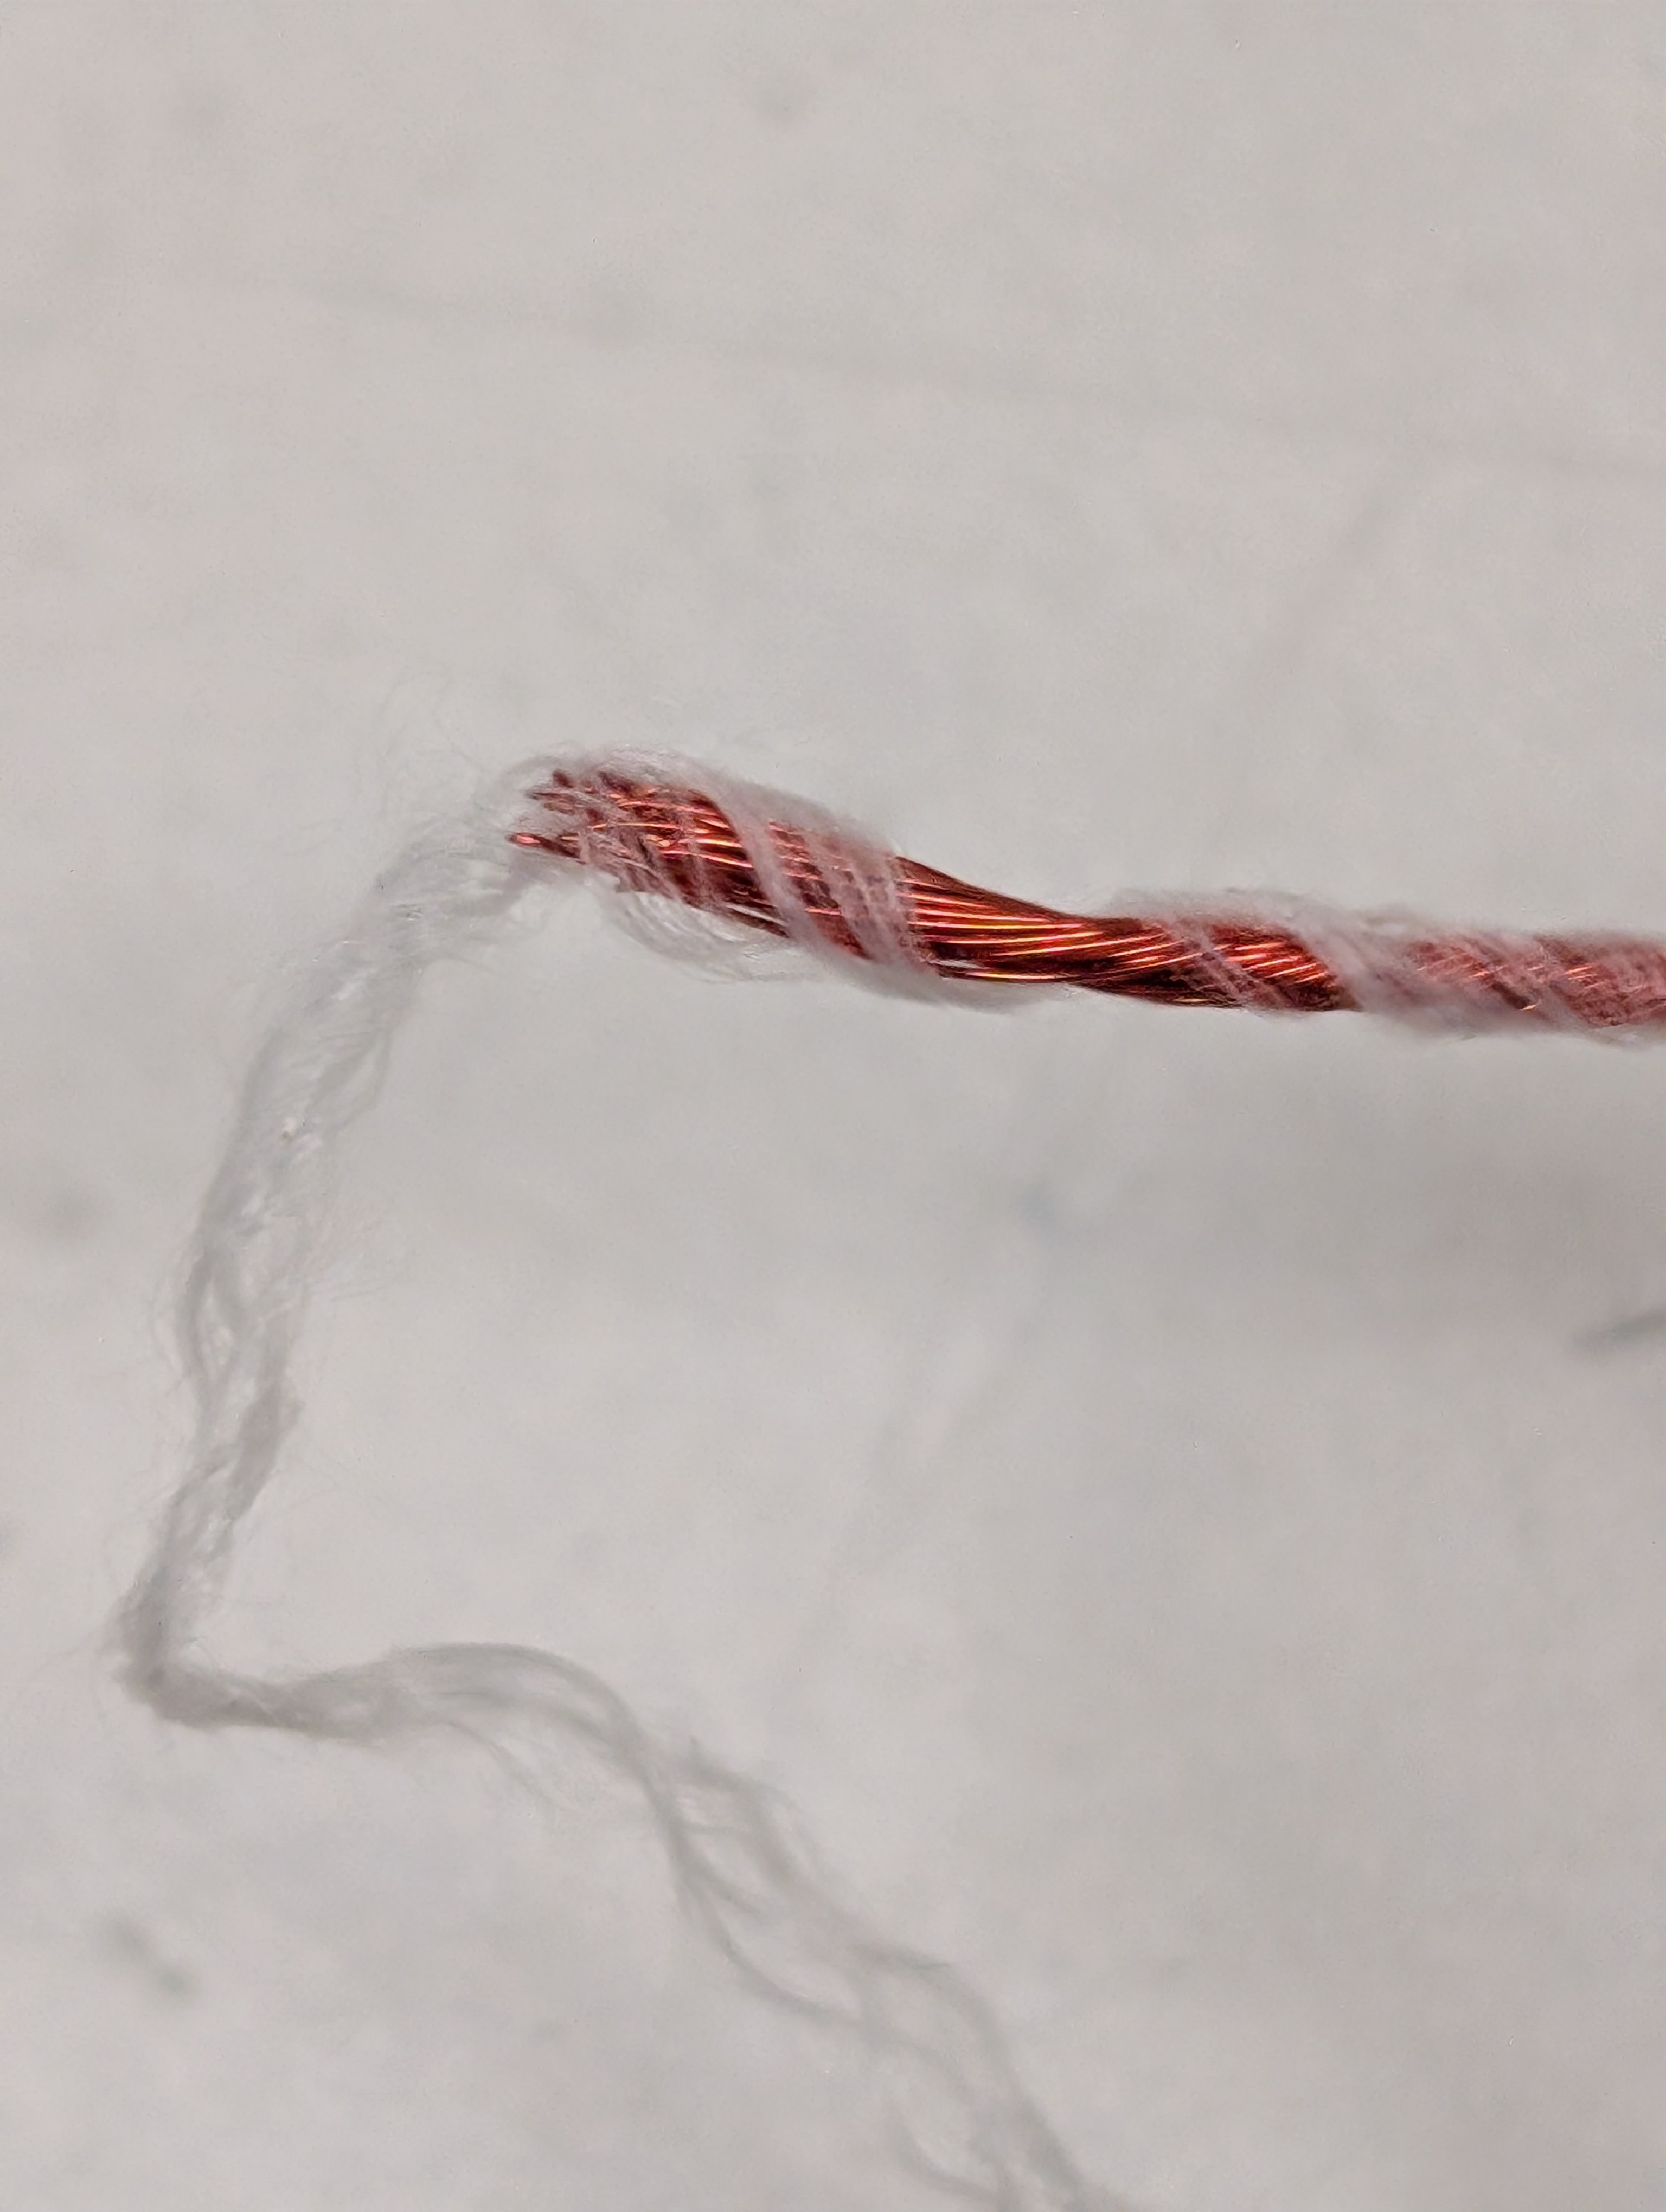
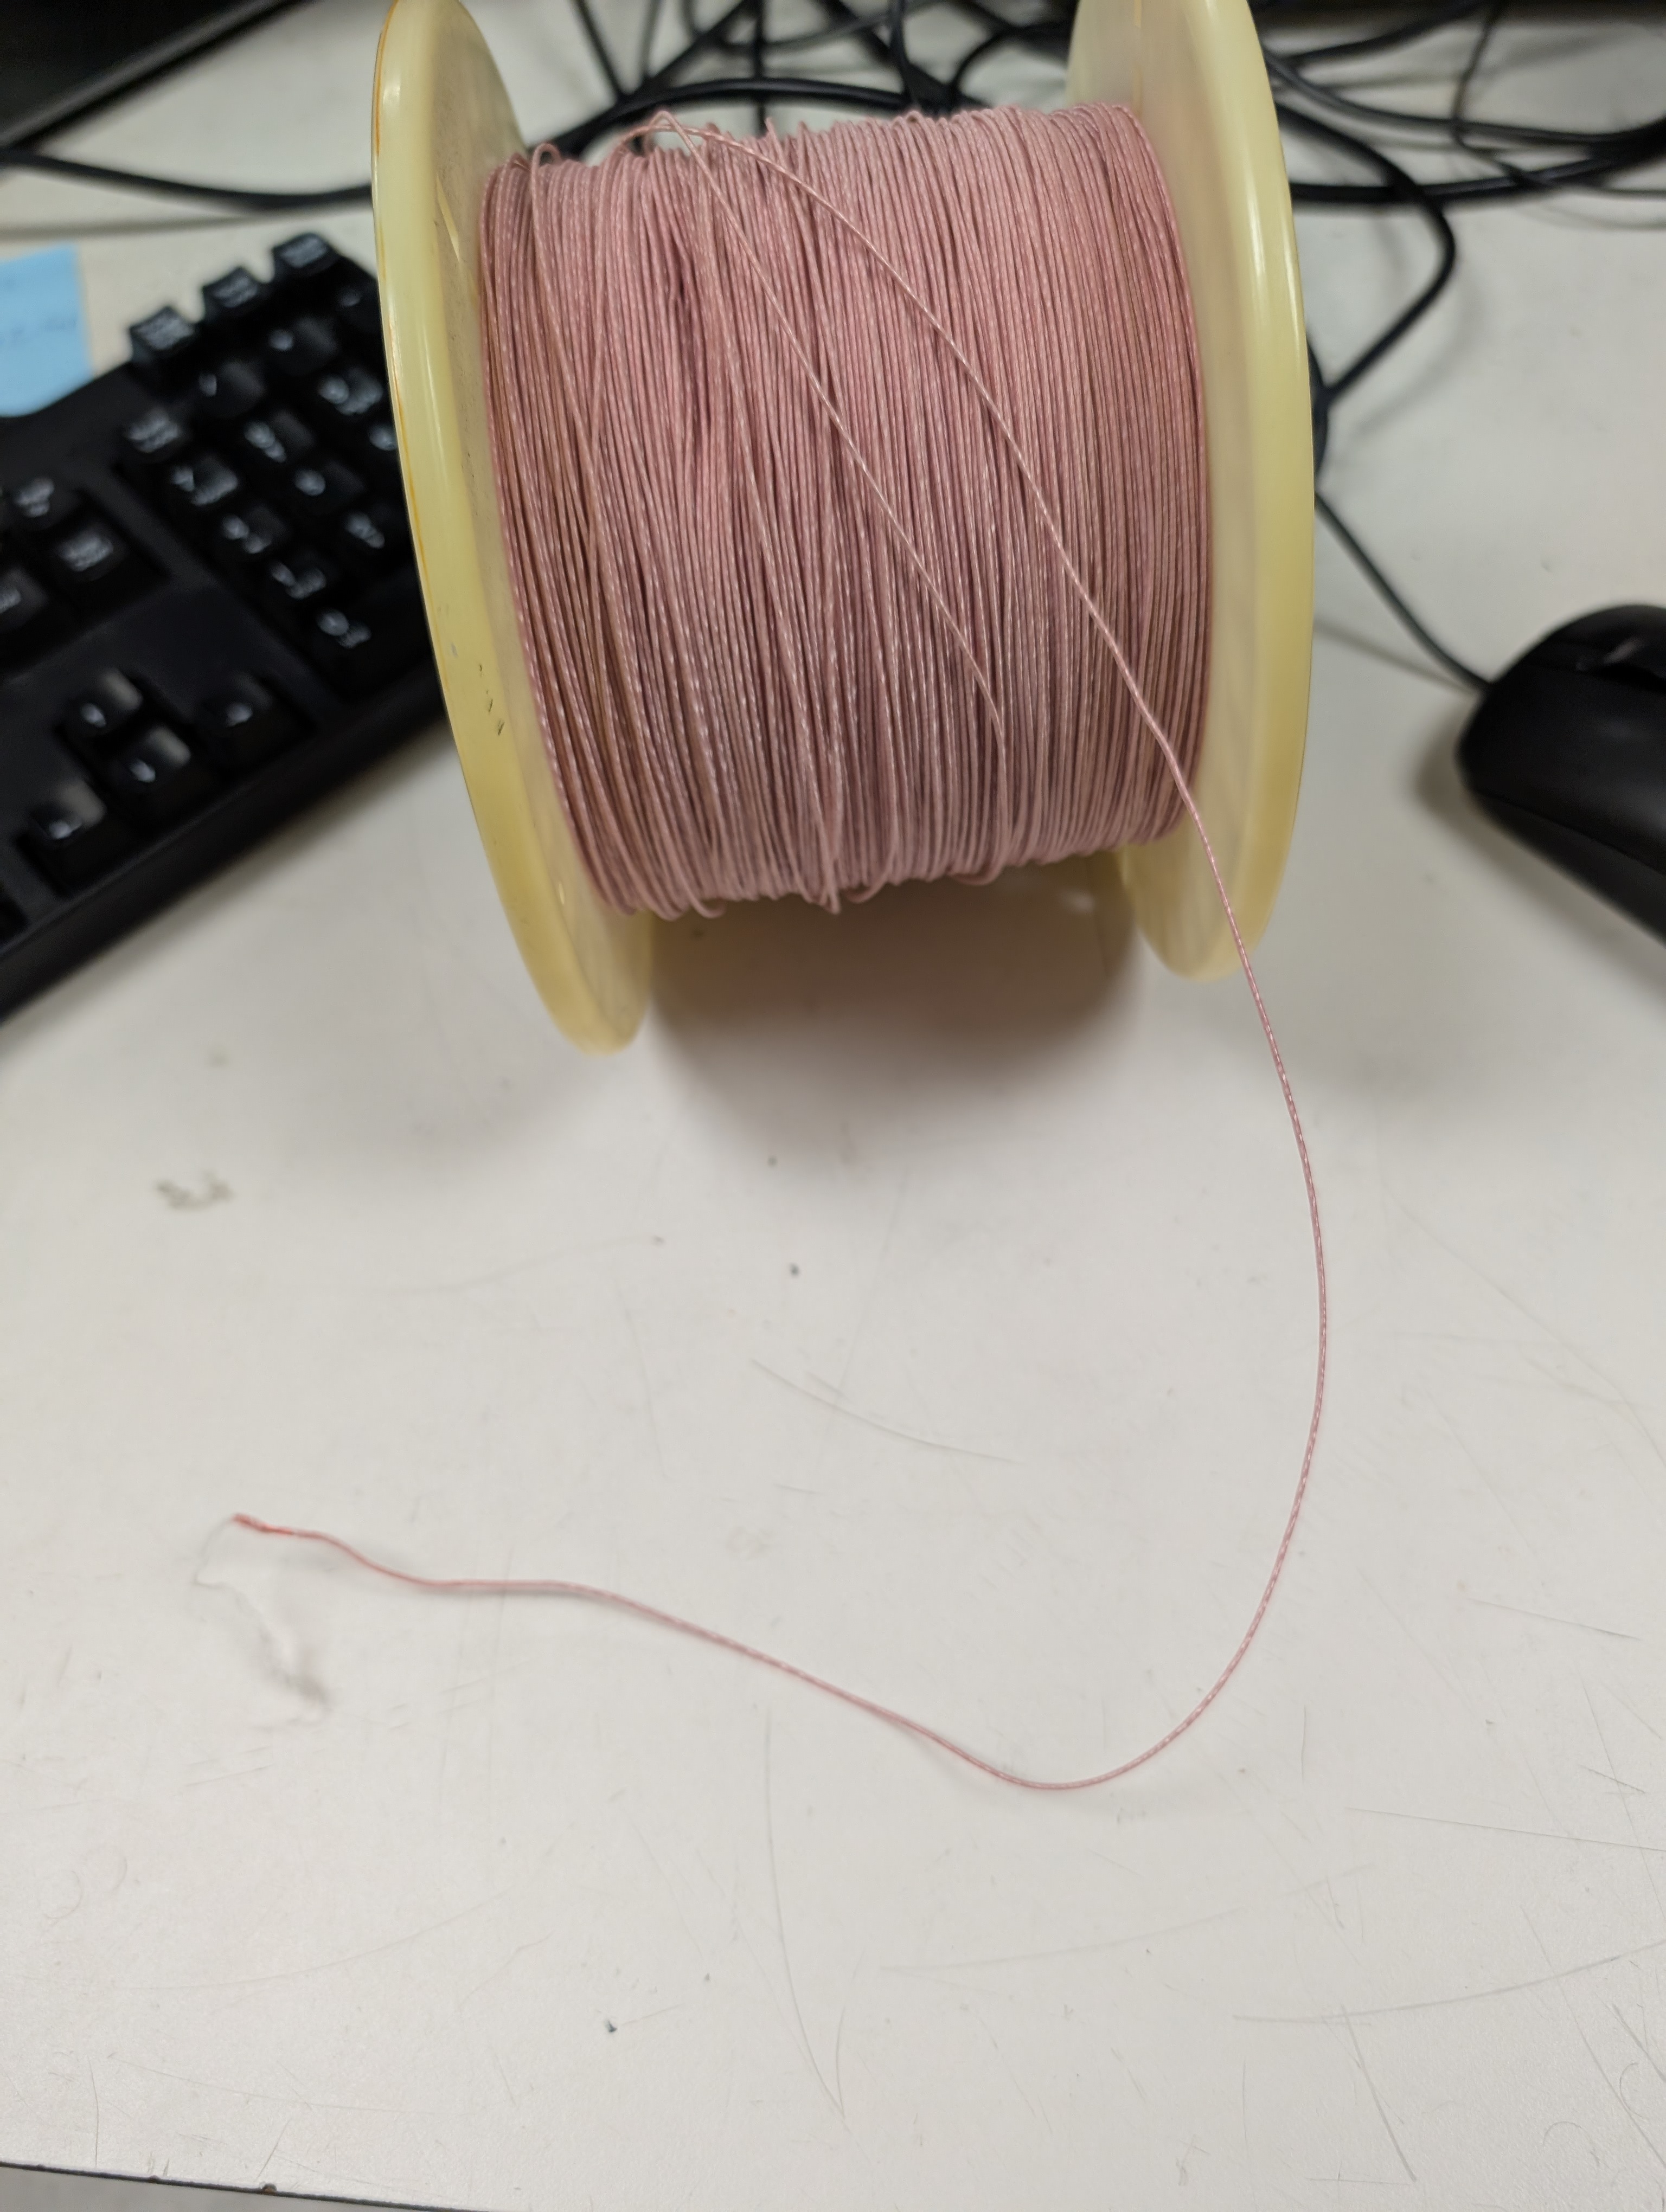
The color is a bit off.
But it is a true litz and would probably make a better coil, not that it would make much difference in this case.
People who do not drink, do not smoke, do not eat red meat will one day feel really stupid lying there and dying from nothing.
Posts: 18,427
Threads: 622
Joined: Oct 2011
City: Jackson
State, Province, Country: NJ
I've seen Chas engaging in this conversation not so long ago, in 2024, about the gauge and color of the wire of the coils.
The AI claims it was greenish insulation color.
Most folks would say it was natural/cream brownish color.
The AWG, I assume, is #24.
I am not trying to rewind now, but in the future I might take a stab at it.
People who do not drink, do not smoke, do not eat red meat will one day feel really stupid lying there and dying from nothing.
Posts: 18,427
Threads: 622
Joined: Oct 2011
City: Jackson
State, Province, Country: NJ
People who do not drink, do not smoke, do not eat red meat will one day feel really stupid lying there and dying from nothing.
Posts: 18,427
Threads: 622
Joined: Oct 2011
City: Jackson
State, Province, Country: NJ
So, after some measurements, the exact gauge of the wire is AWG23, 0.57mm diameter, and the exact thickness of the wire with insulation is 0.887mm in diameter.
The latter is more importan as the wire resistance and skin effect won't make much difference at BC frequencies, but it is more important to keep the geometry, that is the number of turns and the length of the coil.
Now, I pulled one of the inner coils in order to see the original (if somewhat possibly faded) color.
Feast yer eyes, gentlemen:
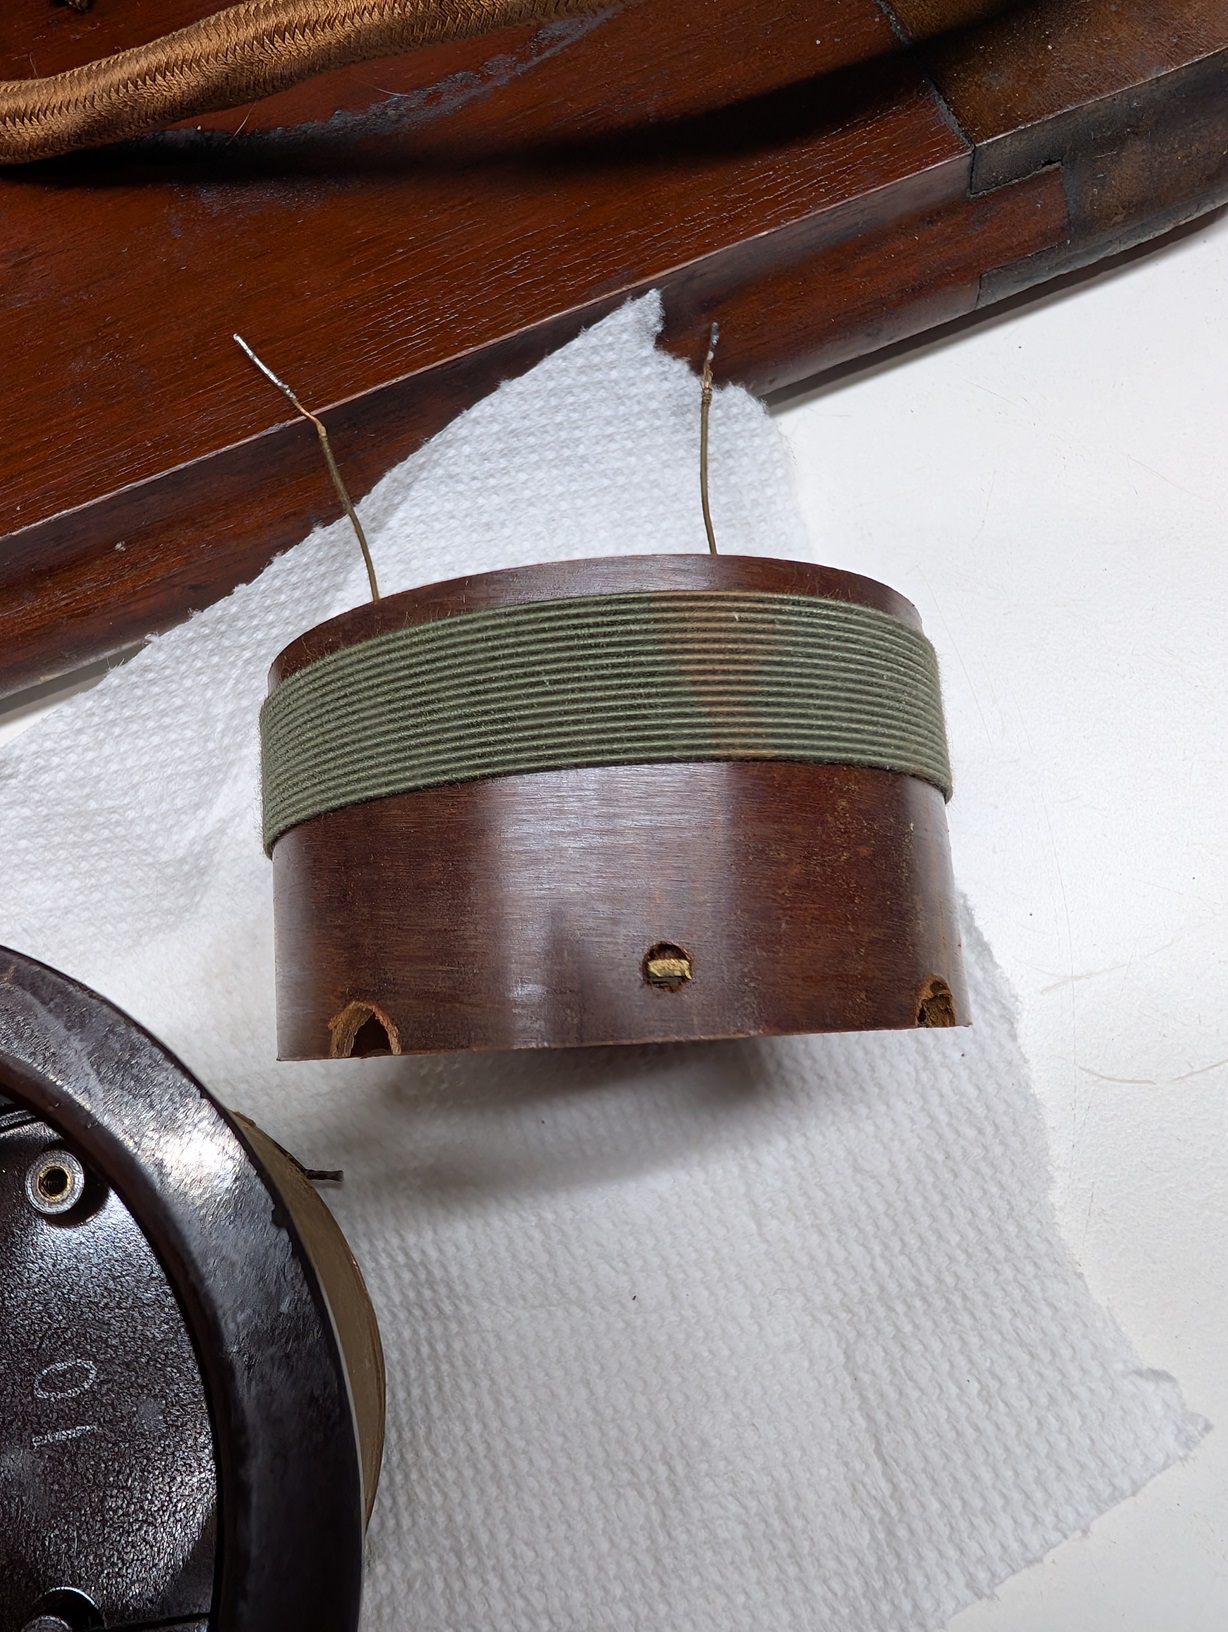
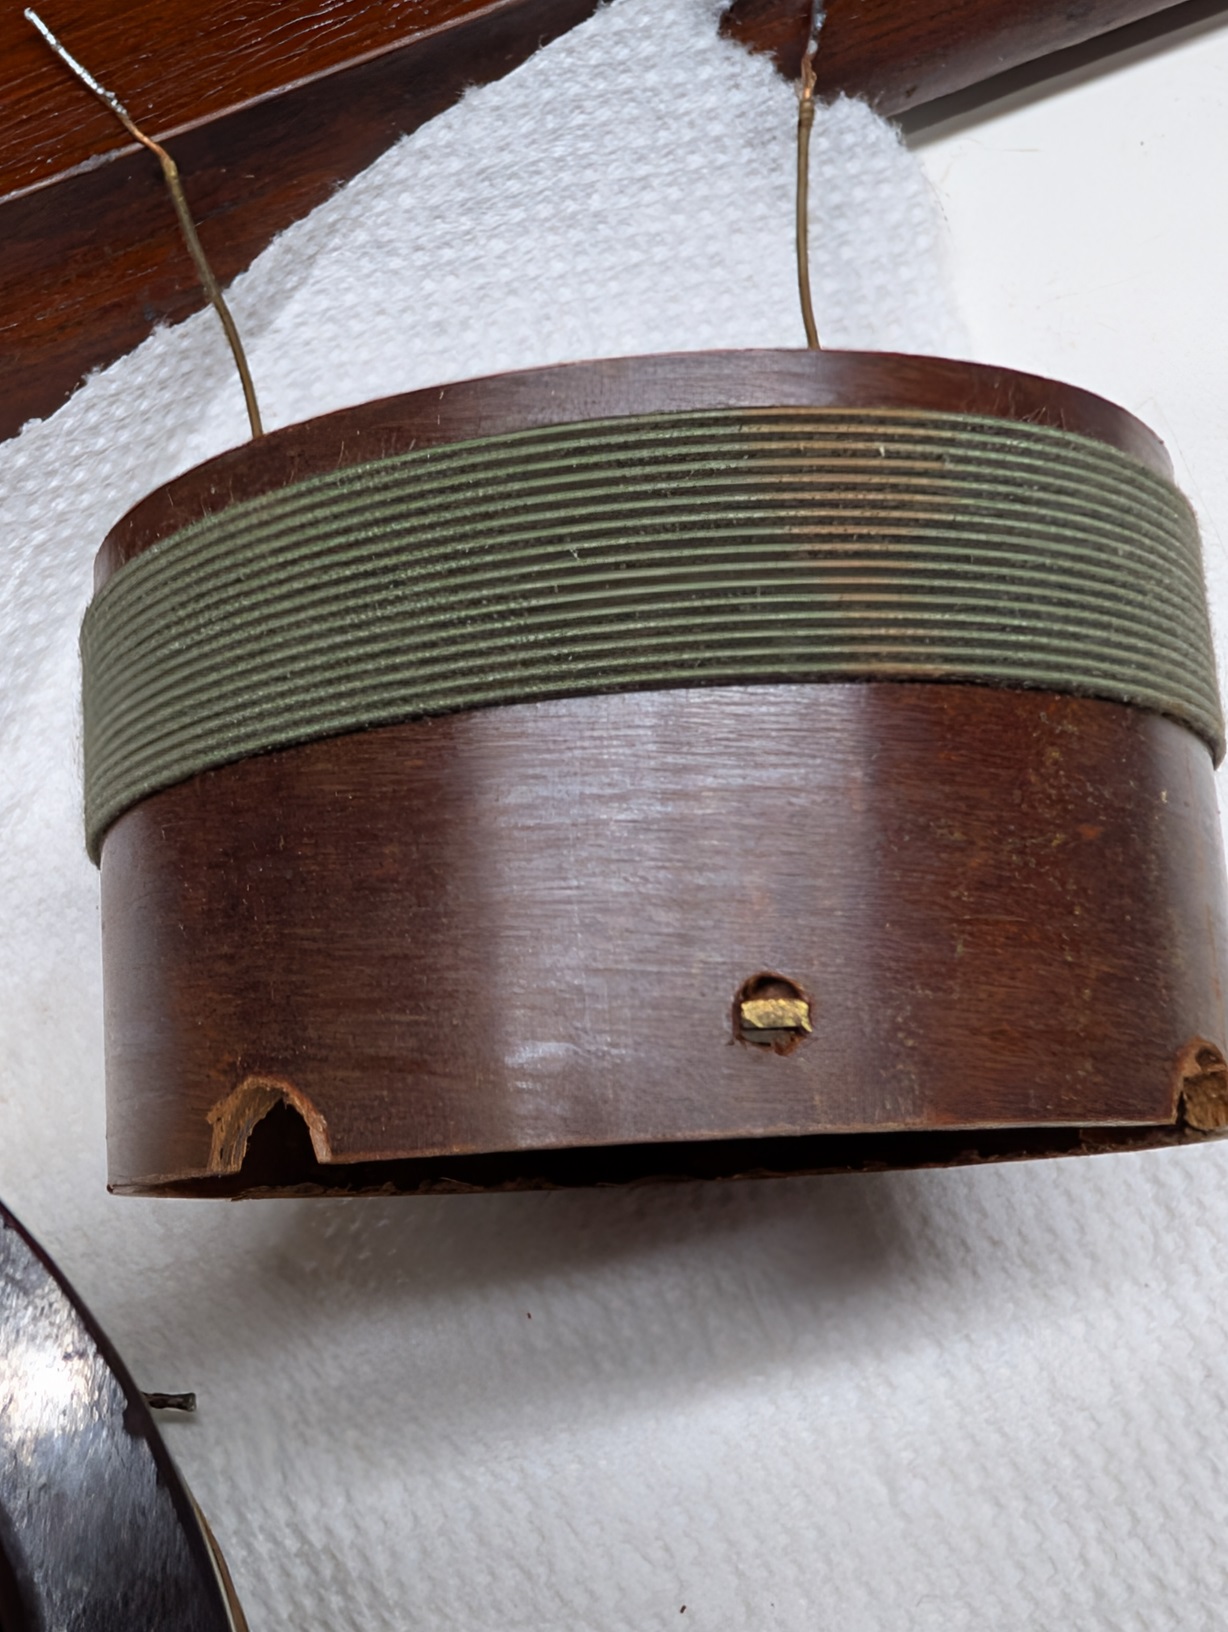
This is what it is, and this is what I will eventually want to get.
People who do not drink, do not smoke, do not eat red meat will one day feel really stupid lying there and dying from nothing.
Posts: 5,656
Threads: 56
Joined: Sep 2008
City: Sandwick, BC, CA
Mike;
It's almost an avocado green, assuming they used the same wire to wind the outer coil as the inner coil. You could probably use a fabric dye to colour the beige stuff, though I would want to rinse it thoroughly afterward. I'm sort of inclined to leave things alone unless it has obviously failed, such as it has come unraveled, does it appear to be green on the underside of the outer coil windings?
Regards
Arran
Posts: 18,427
Threads: 622
Joined: Oct 2011
City: Jackson
State, Province, Country: NJ
At this point I am leaving it alone. This is a plan for the future. Right now I just want it to look decent and start playing.
As for the underside, I have not unwound any, nor do I intend to unless I ever get that wire (Chas showed me some British company, WIRES.CO.UK who sells reasonable amounts for reasonable prices, and also some write-up by Robert Lozier on his way of dyeing these wires).
file:///C:/Users/morzh/Downloads/How%20to%20Dye%20&%20Wind%20DCC%20wire.pdf
I also see these wires from that above company,
https://www.wires.co.uk/acatalog/cotton_cu_hb.html
0.88mm is exactly the total width of my wores. Theirs is 0.315mm diameter or AWG28 and is a bit higher gage than mine, which is AWG23, 0.57mm diameter, but I do not think this matter much, whereas would conform to exact geometry of teh winding.
I am tempted to order it.
People who do not drink, do not smoke, do not eat red meat will one day feel really stupid lying there and dying from nothing.
Posts: 18,427
Threads: 622
Joined: Oct 2011
City: Jackson
State, Province, Country: NJ
Everything is off the board now.
I slathered GOOP pon it again and will leave it overnight.
When taking the last amp off, this fell out.
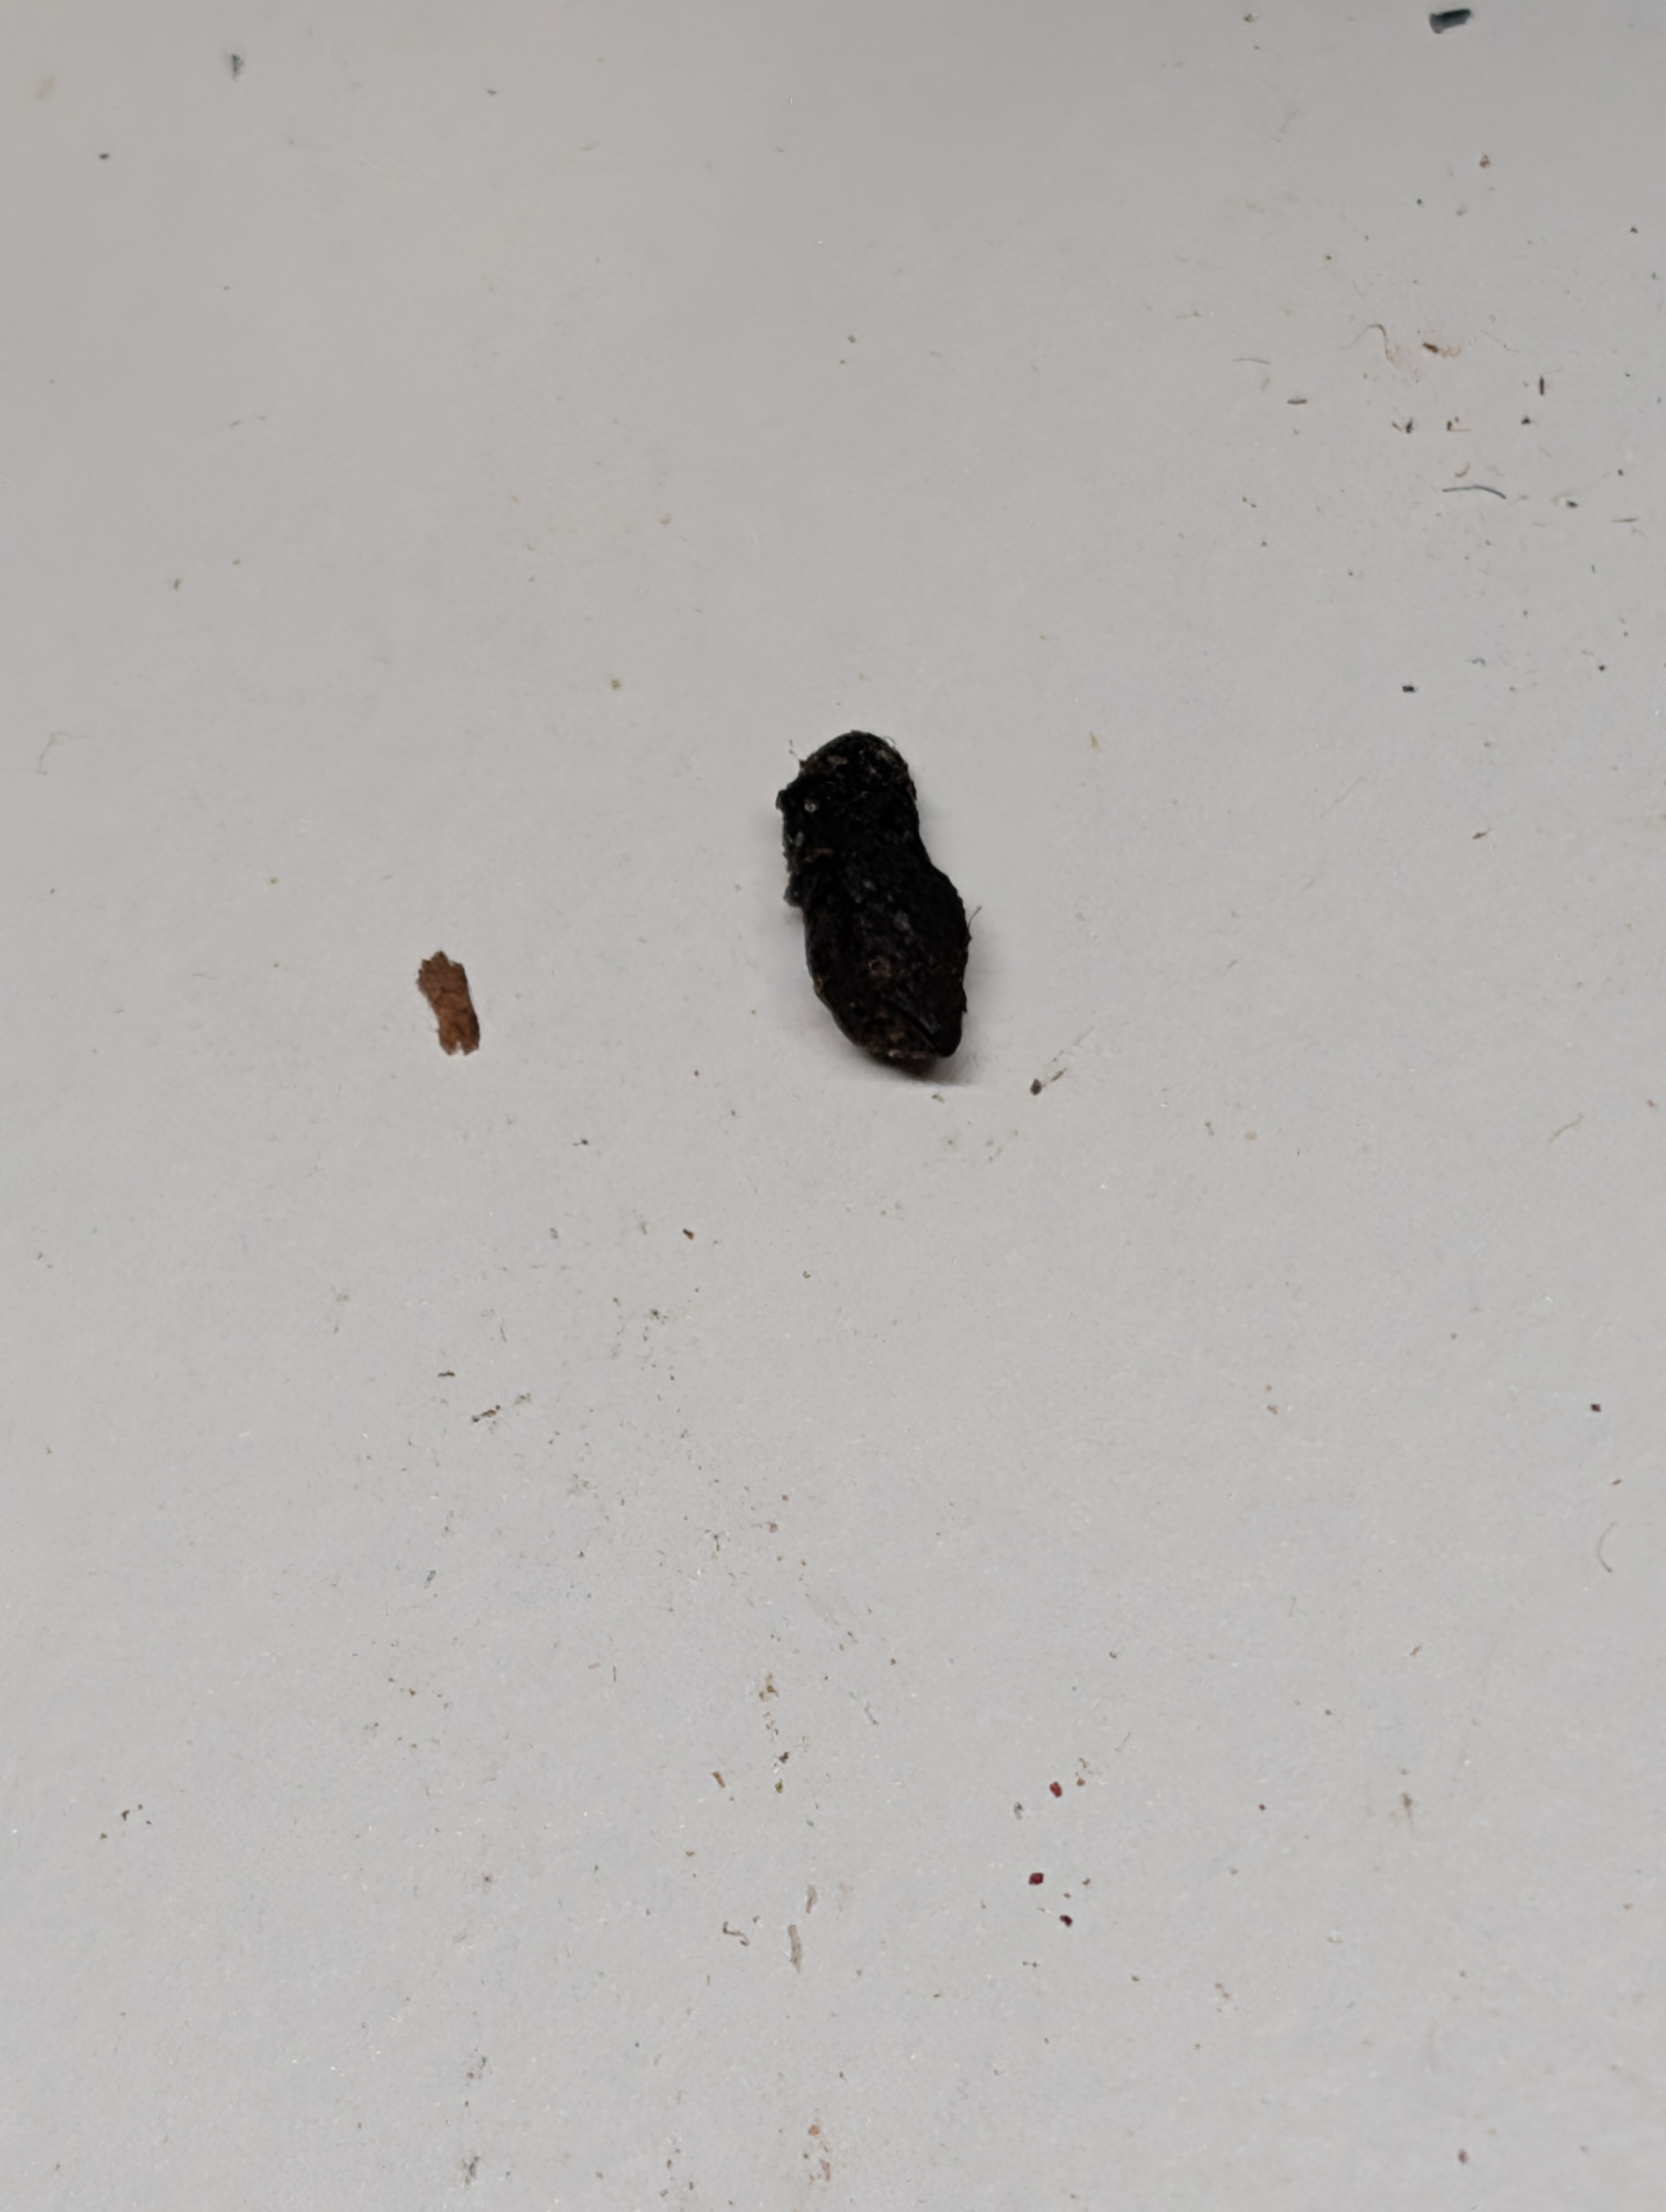
I hope it is not what it looks like. As there was no more across the whole radio. Plus it was inside the amp.
Well, I will attempt the Howard treatment tomorrow. If it does not work well, OK then, I will think of something else.
People who do not drink, do not smoke, do not eat red meat will one day feel really stupid lying there and dying from nothing.
Posts: 3,189
Threads: 226
Joined: May 2008
City: Omak
State, Province, Country: WA
Hello Mike,
I too hope it is not either I have Zenith model 715 which had nest under the chassis .
Sincerely Richard
Posts: 5,656
Threads: 56
Joined: Sep 2008
City: Sandwick, BC, CA
Mike;
It looks like they have a gauge that's closer .56 mm, they also have some that is .71 mm., and have some up to 2 mm (roughly 14 Gauge in our system), I see what you mean about the outer diameters. I'm guessing that the reason for the discrepancy is that their wire is based on British wire gauges of old converted to Metric. I'm lucky in that I inherited some spools of cloth covered coil winding wire from my late uncle, he used to collect and restore 1920s battery radios so he collected such wire whenever he ran across it. He had a model 10 when he was still in Ontario, but I don't think he ever fixed it up, and had others in years before.
As for that black pellet looking thing, it's too black to be a vintage rat dropping, they usually dry up, turn grey, and disintegrate, plus I think there would be more then one found in that set. It's more then likely a ball of tar if there are no holes for anything to fall into, like under a tube socket, or something.
Regards
Arran
Posts: 18,427
Threads: 622
Joined: Oct 2011
City: Jackson
State, Province, Country: NJ
Arran
Yes, this is what I thought too. They usually come with a company.
People who do not drink, do not smoke, do not eat red meat will one day feel really stupid lying there and dying from nothing.
Users browsing this thread: 3 Guest(s)
|
|
Recent Posts
|
|
54C Cabinet Refinish
|
| Roy;
Personally I would have left the asbestos alone if it were my set, but you can find a modern substitute that som...Arran — 04:51 PM |
|
Philco 71 Code 125
|
| Looks like that might be the B- buss, so that would be correct.RodB — 01:32 PM |
|
Philco 71 Code 125
|
| I noticed on the code 121 schematic the center tap for the 6 volt winding and hv winding are tied together. Is this corr...dconant — 12:16 PM |
|
Philco 45-6365 Universal IFT Instruction Manual
|
| The Philco Parts Catalog for 1942 shows it as usable for 175 kHz, 260 kHz, and 465 kHz. The instructions will show how t...DaleHCook — 11:19 AM |
|
Stromberg Carlson 1500 Squeal
|
| Hello Rob,
I agree with you—I have one here at my house that I need to check out. It’s way over-engineered just to make...radiorich — 11:05 AM |
|
My Atwater Kent 84
|
| Well getting around to restoring my AK84. Mike was a big part in me being able to snatch this one a few years ago. I won...462ron — 10:57 AM |
|
Plug Voltages Needed For A 1943 CRV-20130 Power Supply
|
| The engine is a B&S 23 inch cast Iron holds 2 quarts of oil. The Generator is a 4 pole 1800 rpm mine was made in 195...David — 10:51 AM |
|
Philco 45-6365 Universal IFT Instruction Manual
|
| Dale: Modified topic as suggested. It is not for a specific project. I found it in a box of stuff I recently purchased...GRG — 10:34 AM |
|
Plug Voltages Needed For A 1943 CRV-20130 Power Supply
|
|
That looks a lot like an aircraft connector of some kind ...
That is a MIL-5015 style connector, used in a wide v...DaleHCook — 10:19 AM |
|
Philco P45-6365 Universal Transformer Instruction Manual
|
| I would suggest changing the topic from "P45-6365 Universal Transformer" to "45-6365 Universal IFT."...DaleHCook — 10:08 AM |
|
Who's Online
|
There are currently 1229 online users. [Complete List]
» 2 Member(s) | 1227 Guest(s)
|
|
|

|
 
|









