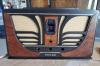
Zenith 9-S-262 Restoration Chronicles
Posts: 479
Threads: 73
Joined: Mar 2012
City: Riverside, CA
Per morzh's tip above I changed my mind on leaving P/N 22-571 alone and just using lugs to wire in replacements (Thanks morzh!!!). I've come this far so I thought I might as well do it right. This electrolytic capacitor has three capacitors inside (C19, 2 mfd, 450V / C20, 6 mfd, 200V / C21, 8 mfd, 450V). The replacements were all the same value and all 3 are rated at 450V. This is the can they go into. I inserted a screw inside the bottom so I could have something to grab onto:
[Image: http://antiqueradios.com/gallery/main.ph...alNumber=2]
I thought I may have to heat this with a heat gun to soften it up enough to pull out but it slid right out without it:
[Image: http://antiqueradios.com/gallery/main.ph...alNumber=2]
Here is the replacement I made to place inside:
[Image: http://antiqueradios.com/gallery/main.ph...alNumber=2]
I used hot glue to hold it in place inside the can. I didn't use too much. I wanted to make sure the repair was clearly visible and I wanted it to be easy to remove for someone who may have to work on this down the road someday:
[Image: http://antiqueradios.com/gallery/main.ph...alNumber=2]
Here it is after installation:
[Image: http://antiqueradios.com/gallery/main.ph...alNumber=2]
Here is a photo of the other electrolytic (C18, 12mfd, 450V). I cut the can as close as possibble to the bottom, cleaned out the inside, inserted the replacement, and then used JB Weld to to put the 2 pieces back together again. The repair left a visible line where the JB Weld was so I wrapped a small piece of muffler tape around it. It turned out better than I thought:
[Image: http://antiqueradios.com/gallery/main.ph...alNumber=2]
The wiring of the underside of the chassis is about 95% complete.
[Image: http://antiqueradios.com/gallery/main.ph...alNumber=2]
One thing I'm going to have to spend some time on is the Dual Fixed Padder (C7). As you may recall from my earlier posts I totally disassembled and cleaned this. Here it is before cleaning:
[Image: http://antiqueradios.com/gallery/main.ph...alNumber=2]
[Image: http://antiqueradios.com/gallery/main.ph...alNumber=2]
I've been given tips on how to align this after everything is back together. But I checked the continuity between the upper and lower left side lugs. This should not have continuity but it did. Same on the right side. So I'm going to have to spend some time and take this apart again and see where the opposing plates are touching. Shouldn't be a big deal, just tedious.
Well, that's all for now... stay tuned and thanks for following along!!!
- Geoff
(This post was last modified: 07-11-2013, 04:18 PM by Geoff.)
Posts: 18,427
Threads: 622
Joined: Oct 2011
City: Jackson
State, Province, Country: NJ
Geoff
One thing I did in mine was, and it may be kinda late for you to do, especially if you did discard the old capacitors, I drilled out every single one of them old caps, cleaned them, and inserted the new axial caps inside, potting them afterwards.
This adds to the authenticity - the big orange-colored caps totally overshadow the fact that the resistors are the newer types (I am not dedicated enough to do that painted ceramic cast on new resistors, using old resistors to create the molds).
I think it maybe took me a couple of hours overall, including soldering, to do all the caps. Yes it is the underbelly, but still.....
Also, for the future, when you have the old electrolytic like the one you had to cut (the aluminum type), it pays to cut it right under the top cap. There is a natural seam there, so if you cut it neat enough (and you still have good enough access to the innyrds when you gut it and replace the new caps), then when you glue it back with whatever (I use the same JB Weld) it is not really noticeable unless you really look, so no aluminum tape wrap is needed.
Posts: 479
Threads: 73
Joined: Mar 2012
City: Riverside, CA
I thought about drilling it out the way you mentioned but since it is only noticed when viewed from the underside of the chassis I wasn't as concerned. And in all honesty, I just wasn't motivated enough so I just tossed out the innards.
I'll try your tip on the aluminum electrolytic on my next project.
Thanks!!!
- Geoff
(This post was last modified: 09-05-2012, 06:41 PM by Geoff.)
Posts: 479
Threads: 73
Joined: Mar 2012
City: Riverside, CA
It's been quite awhile since I've had time to work on this but I was finally able to get somework done last weekend. For the most part, the wiring is complete except for around the volume control. The Zenith schematics have a parts list but sometimes there are more than one for each designation. For example, C10 is a 0.02fd capacitor. It is only listed once but there are actually 2 C10's in the schematic so I came up short on a few capacitors. I placed an order for more and should get them next week.
I refurbed the motor that drives the motorized tuning. Here is a picture before I cleaned it up:
[Image: http://antiqueradios.com/gallery/main.ph...alNumber=2]
[Image: http://antiqueradios.com/gallery/main.ph...alNumber=2]
[Image: http://antiqueradios.com/gallery/main.ph...alNumber=2]
[Image: http://antiqueradios.com/gallery/main.ph...alNumber=2]
Here are all the parts after being cleaned up and all the metal pieces polished:
[Image: http://antiqueradios.com/gallery/main.ph...alNumber=2]
And here is the motor re-assembled:
[Image: http://antiqueradios.com/gallery/main.ph...alNumber=2]
[Image: http://antiqueradios.com/gallery/main.ph...alNumber=2]
I placed several drops of oil on the felt washers. One of them was pretty hard and did not soak up as much oil as the other. The oil I used was from a Lionel train maintenance kit I have. It is a light machine oil.
The shutter assembly is back on the chassis but I do not have a picture of that. I'm hoping to wrap up the chassis by the end of the month so stay tuned!
- Geoff
(This post was last modified: 07-11-2013, 04:21 PM by Geoff.)
Posts: 479
Threads: 73
Joined: Mar 2012
City: Riverside, CA
I got my capacitor order and finished up the last of the wiring last night. This morning I slowly brought it up on my variac. I'm always a little nervous firing up a radio for the first time after a complete rewire like this. After getting to 117V I tried out the motorized tuning and everything worked great. I then started scanning tha AM dial and to my delight I was able to receive quite a few stations loud and clear! I tried out the Foreign and Amateur bands and, although I only have a 2 foot piece of wire hooked up, I was able to hear some faint stations on both bands. I went back to the AM band and then peaked the IF transformers by ear. I'll go back and do a full alignment later. I'm back on the AM band right now and listening as I write this. Here is a photo:
[Image: http://antiqueradios.com/gallery/main.ph...alNumber=2]
I'll be posting more photos later and I have a few touch-ups I need to do. The belt for the motorized tuning slips a little and I've noticed that the tuning eye does not open or close. Anyways, just wanted to post this update.
- Geoff
(This post was last modified: 07-11-2013, 04:22 PM by Geoff.)
Posts: 711
Threads: 46
Joined: Sep 2009
City: Lapeer, MI
State, Province, Country: USA
Great job Geoff!  Can't wait for more photos. Joe
Courage will follow when Faith takes the lead.
(This post was last modified: 10-21-2012, 02:07 PM by Joe Rossi.)
Posts: 18,427
Threads: 622
Joined: Oct 2011
City: Jackson
State, Province, Country: NJ
Nice looking chassis, Geoff.
Once you align it, it'll bring in tond of SW band stations. Not that itr does much good - I do not speak Chinese, Japanese, or much Spanish, and I do not listen to Russian station ""Voice of Moscow" especially in view of its political orientation.
But it's nice.
I tell you more: I found out that two of the tubes were ion the red zone when tested, one a bit and another one quite a bit.
I changed them for NOS (tested stellar). No effect. The radio picks up the same stations at the same sgtrength, so it is fairly well designed.
Oh, and don't forget - you should liosten to your SW on the ""long distance' setting and not "local". Thios way it is waaaay more sensitive.
Posts: 479
Threads: 73
Joined: Mar 2012
City: Riverside, CA
I've found that the "Local" selection is all but useless. There is a station here in my city that I can hardly hear on the "Local" setting. In order to receive anything with any strength I need it set to "Distance".
- Geoff
Posts: 18,427
Threads: 622
Joined: Oct 2011
City: Jackson
State, Province, Country: NJ
No, it is not at all useless.
I thought so too, especially after I found out that there is supposed to be a 47K resistor and it was 1.4K in that first toob's cathode that LD switch shorts, and I replaced it and it still did make no difference; then I found out one of my first RF xfmr's winding opened.
Once it worked, I listen to my local station only on Local setting, as otherwise it is unbearably loud even without any antenna. Called ""Good times oldies", in Lakewood. Reeeely loud. With Local setting it is nice, clear and very loud.
Posts: 16
Threads: 1
Joined: Jan 2012
You can replace that 47k resistor with a 12k and the local function works a lot better! Maybe a little higher value is you transmit AM though a sstran or whatever.
Did you make sure you replace the 1meg in the eye tube socket?
(This post was last modified: 10-21-2012, 10:47 PM by jth877.)
Posts: 479
Threads: 73
Joined: Mar 2012
City: Riverside, CA
Yes, I replaced the 1 MEG resistor when I rewired the eye tube socket. All of the original wires were pretty rough. Maybe I'm not getting too much action on the eye tube because I am only using a 2 foot piece of wire for the antenna right now?
What is the resistor number for the 47K you are mentioning? I checked all of the coil windings after I removed all the wiring and everything checked out OK.
- Geoff
(This post was last modified: 10-21-2012, 11:58 PM by Geoff.)
Posts: 16
Threads: 1
Joined: Jan 2012
Yeah a 2ft wire won't move a 6u5 too much, try a 6e5 as a simple function test. The resistor is an R2 (I think). This thread explains where it is.
http://antiqueradios.com/forums/viewtopi...e+resistor
Posts: 479
Threads: 73
Joined: Mar 2012
City: Riverside, CA
Yes, you are right. It is R2. I'll try a 6E5 tube later this week.
Thanks!
- Geoff
Posts: 18,427
Threads: 622
Joined: Oct 2011
City: Jackson
State, Province, Country: NJ
It is R2, in the cathode of the first 6K7G. It is shorted when you put the switch on "Long distance" thus increasing the gain.
Posts: 18,427
Threads: 622
Joined: Oct 2011
City: Jackson
State, Province, Country: NJ
I use 6E5, works fine.
I used 0603 SMT resistor and two wire strands, put it right under the tube base - this was I did not have to open the socket which is prone to cracking.
(I have to patent this.....)
Users browsing this thread: 1 Guest(s)
|
|
Recent Posts
|
|
Philco P45-6365 Universal Transformer Instruction Manual
|
| Can anyone guide me to where this may be found?GRG — 03:00 PM |
|
54C Complete Teardown/Rebuild
|
| I don't think that I have encountered a 12Z3 before, curious how it uses one of those but includes a #43, which is a 25 ...Arran — 02:17 PM |
|
HiFi (Chifi) tube amp build - but my own design.
|
| It's the other forum. I'm also in DIY, but mostly read there. Honestly, I kinda jumped into this without much thought to...TV MAN — 10:43 AM |
|
Philco 71 Code 125
|
| Hello,
I am in need of a schematic for this radio. Mine has the three separate circular tube shields and a shadow me...dconant — 08:06 AM |
|
Stromberg Carlson 1500 Squeal
|
| And life just keeps getting more complicated.dconant — 07:57 AM |
|
54C Complete Teardown/Rebuild
|
| Hello Roy,
here is this one
sincerely Richardradiorich — 12:45 AM |
|
54C Complete Teardown/Rebuild
|
| Richard,
Had grabbed it already but thank you just the same. I find myself wanting to find some way to block out the...glyphmon — 12:03 AM |
|
54C Complete Teardown/Rebuild
|
| Hello roy,
here is a link to the schematic .
Sincerely Richardradiorich — 11:54 PM |
|
54C Complete Teardown/Rebuild
|
| Richard,
The Silvertone 2014 also is a transformerless set, so I am incorporating a 1:1 600 ohm audio isolation transfo...glyphmon — 11:37 PM |
|
Preliminary work on wife's Silvertone 2014
|
| Did an alignment today which was interesting. IF alignment went great, almost all was already spot-on. Adjusting on th...glyphmon — 11:35 PM |
|
Who's Online
|
There are currently 1692 online users. [Complete List]
» 2 Member(s) | 1690 Guest(s)
|
|
|

|
 
|