Posts: 3
Threads: 3
Joined: Jan 2024
City: Ogden
State, Province, Country: Utah
Hi all
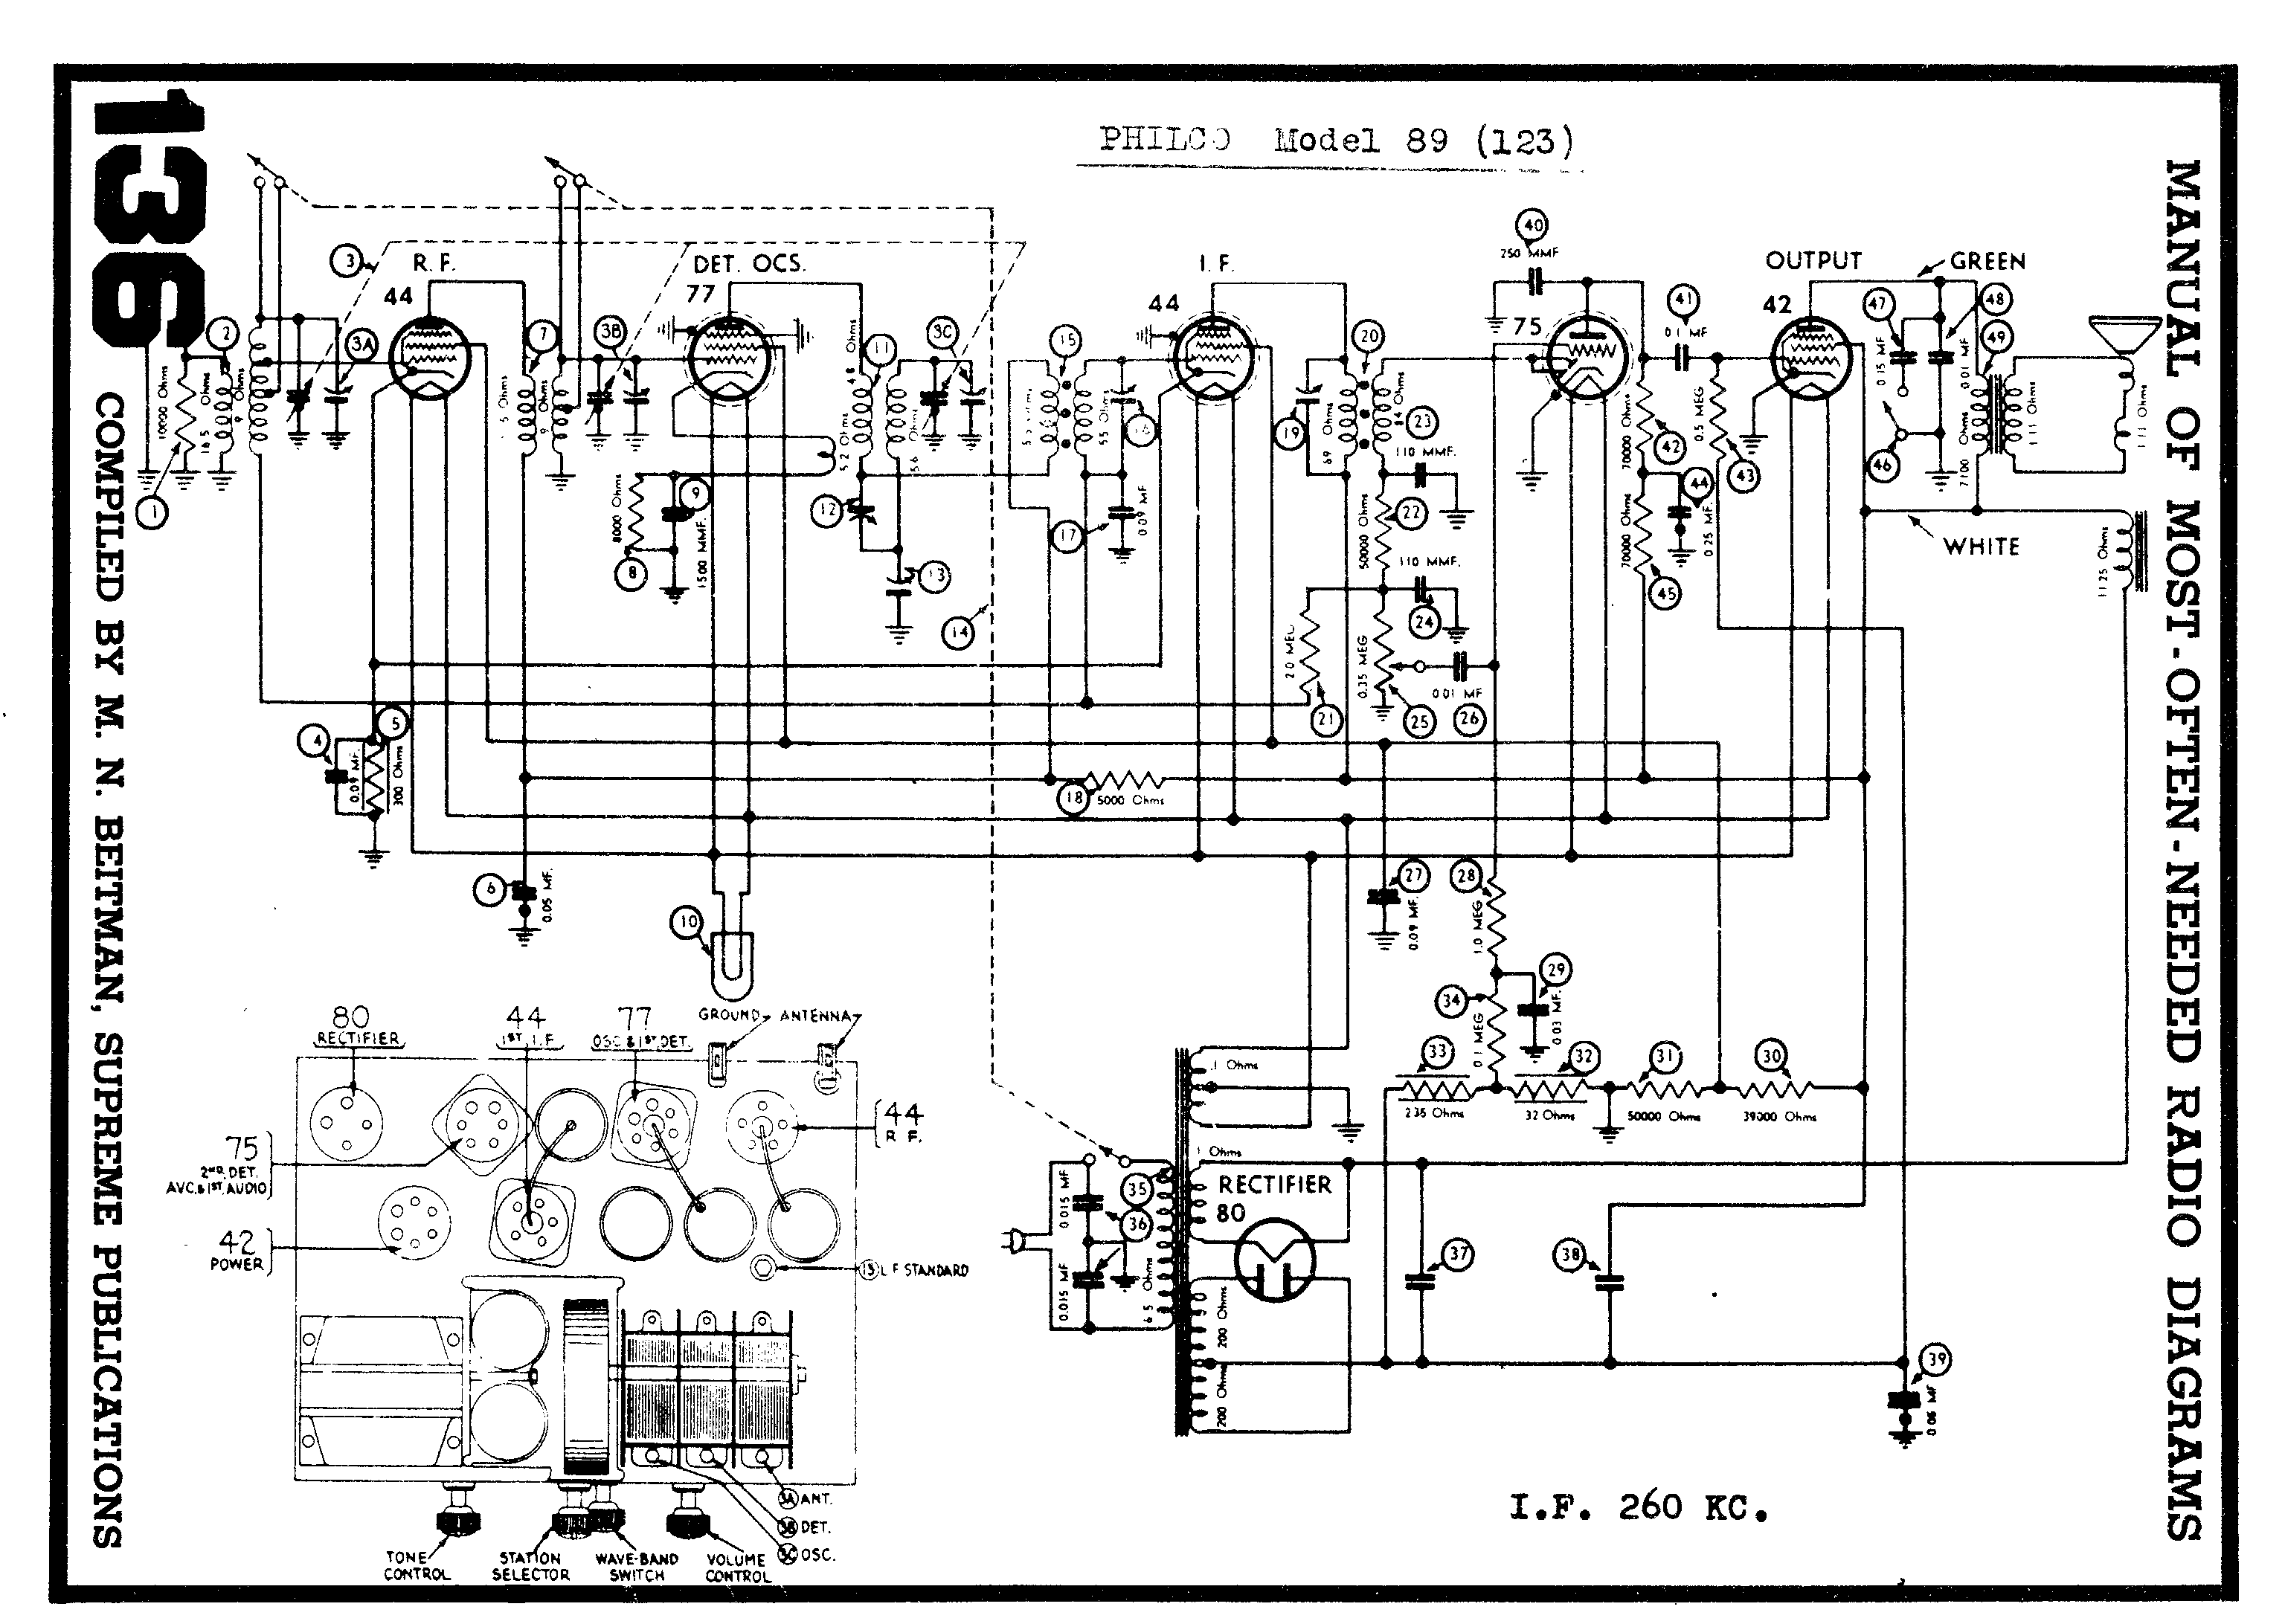
need nelp I have a philco 89 model 123 with the short wave
I have a open interstage transformer (2) coil between rf and oscillator coil and can not seem to locate the spec of the primary side of coil ,
mine is very corroded in one spot and open with almost every turn
does anyone have specs on this coil ie number of turns and wire size ?
kinda new to this hobby I have some magnet wire but prob not correct guage
... please any help you welcome to email me not sure if this is allowed Westerngardener@msn.com or KB7KP@usa.com
thanks Art-
(This post was last modified: 04-28-2024, 10:17 AM by
aSamuel.)
Posts: 1,122
Threads: 21
Joined: Jan 2014
City: Wellborn Florida
Never worked on a 89 but have some info that might help. Beitmans list ohms for the coils so can guess at length of wire. Link to the Philco library.
https://philcoradio.com/library/ Plus a sch from Beitmans.

Posts: 603
Threads: 8
Joined: Apr 2018
City: S. Dartmouth
State, Province, Country: MA
All the information needed is in the coil itself. Map the coil to a sheet of paper to locate the lugs, connections and winding data. Remove start or finish end of the top most winding, carefully. The coil will be sealed with a combination of bees wax and a hard damar wax. A solvent like odorless mineral spirits and a heat gun can be used to carefully clean the coils in place. Be careful be sure all mineral spirit is off the coil and out of the work area when firing the heat gun. With one coil end removed use either calipers or a micrometer to get the diameter, subtract 1 or 2 thou. for the film coating. Use a magnifier and a wooden probe and count the turns and direction. Make the notes on the coil to the paper. When all data is on the paper in the form of a diagram with text, soak the form with mineral spirits and slowly unwind. keep all the wire bits for possible data recovery, (length). The winding liner is likely celluloid, it rots and the acids take the winding out. Kapton tape can be used as a liner or acetate sheet. When all turns are off and counted clean the coil form completely, use a lighter solvent if need be.
Prepare 1-1/2 cups of meted bees wax at about 150F, double boiler or electric hot plate do not over heat. Place the cleaned form in the wax and soak for 5 minutes, it may bubble, let that happen as it is moisture. Remove the form while hot, there will be a thin film of wax... Do not wipe off, the film is tacky and will grip the turns of wire so they won't unravel. With the data sheet and the tacky form, wind the coil. The project can be stopped for a break because the wax will hold the wire. Wind the first layer, place the liner (tape). Brush on with acid brush more wax, heat of wax may cause the tape to fail so do not dunk. Complete the winding. Solder the leads in place. Dunk the entire coil into the wax quickly, remove let cool then repeat twice more, allowing the form to cool in between dunking. A thick film of wax will seal out all moisture. The coil is complete and can be installed.
Use real refined bees wax not paraffin or bees wax blend for candles. These melt at too low a temp. and are slippery, not tacky. The lighter the color of the bees wax the more refined it is...
GL
Chas
Pliny the younger
“nihil novum nihil varium nihil quod non semel spectasse sufficiat”
(This post was last modified: 04-28-2024, 09:21 PM by
Chas.)
Posts: 1,444
Threads: 88
Joined: May 2008
City: Omak
State, Province, Country: WA
Hello Chas,
Thanks for the Tip I use Use real refined bees wax for my Capacitor's .
Sincerely Richard
Posts: 7,219
Threads: 266
Joined: Dec 2009
City: Roslyn Pa
If you are talking about the primary of the ant coil #2 I would go w/20' of 38G wire.
https://philcoradio.com/library/download...20146B.pdf
When my pals were reading comic books
I was down in the basement in my dad's
workshop. Perusing his Sam's Photofoacts
Vol 1-50 admiring the old set and trying to
figure out what all those squiggly meant.
Circa 1966
Now I think I've got!
Terry
(This post was last modified: 04-30-2024, 12:03 AM by
Radioroslyn.)


